Getting Started: Adding Recipes
If you are going to use MyFoodPlanet to meal plan, you are going to need to add recipes to your account. There are at least 4 main ways to add recipes to your account.
- Add recipes using the url importer (for adding recipes from your favorite blogs and websites)
- Add recipes manually by typing them in or copying and pasting.
- Add recipes by searching the MyFoodPlanet recipe database of over 2.3 million recipes. (see this article for more)
- Save recipes created by Orion, the AI-powered assistant. (see this article for more)
In this article, we’ll cover items 1 and 2 in the list above.
NOTE: The recipe importer works for most websites that follow standard formatting for recipes. If a particular recipe won’t work in the importer, please feel free to let us know using the feedback button or by emailing support@myfoodplanet.com. In some cases, you may have to enter the recipe manually if it can’t be imported.
Import A Recipe Using The URL
Step 1
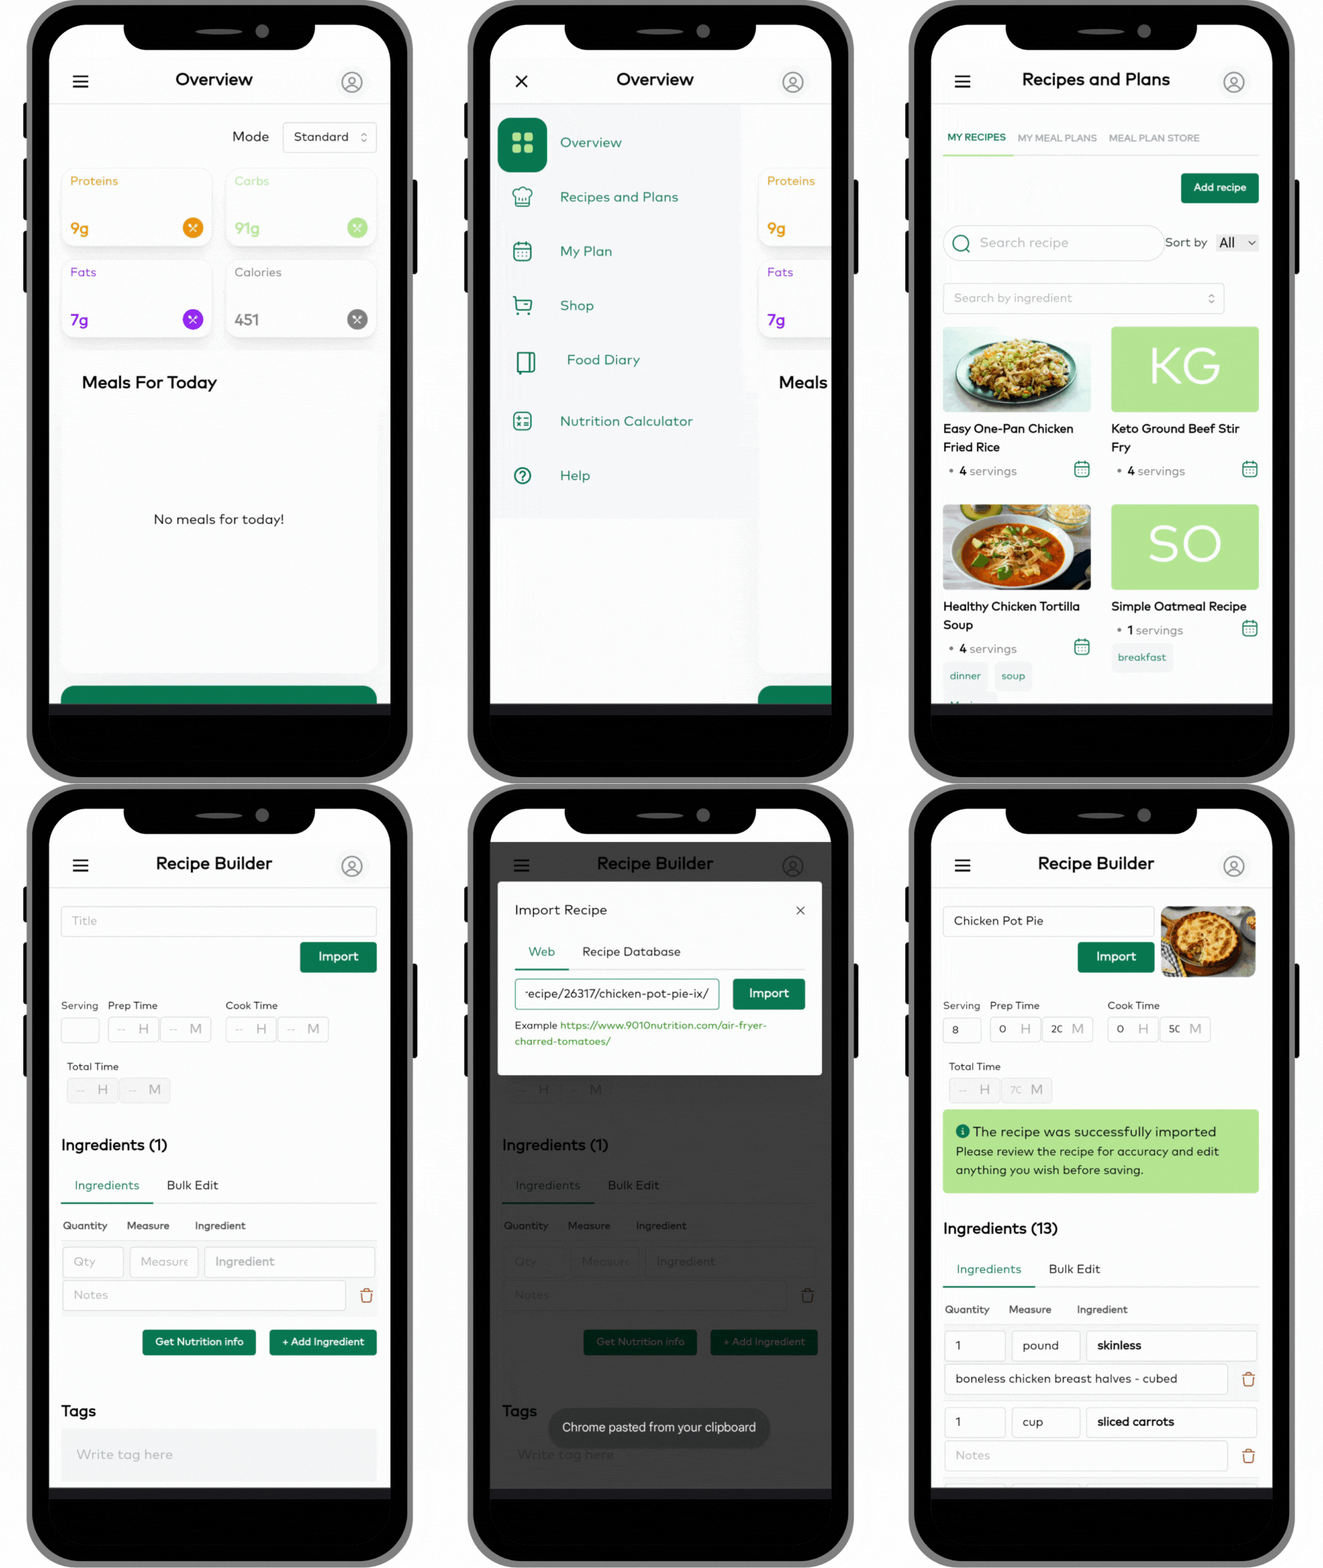
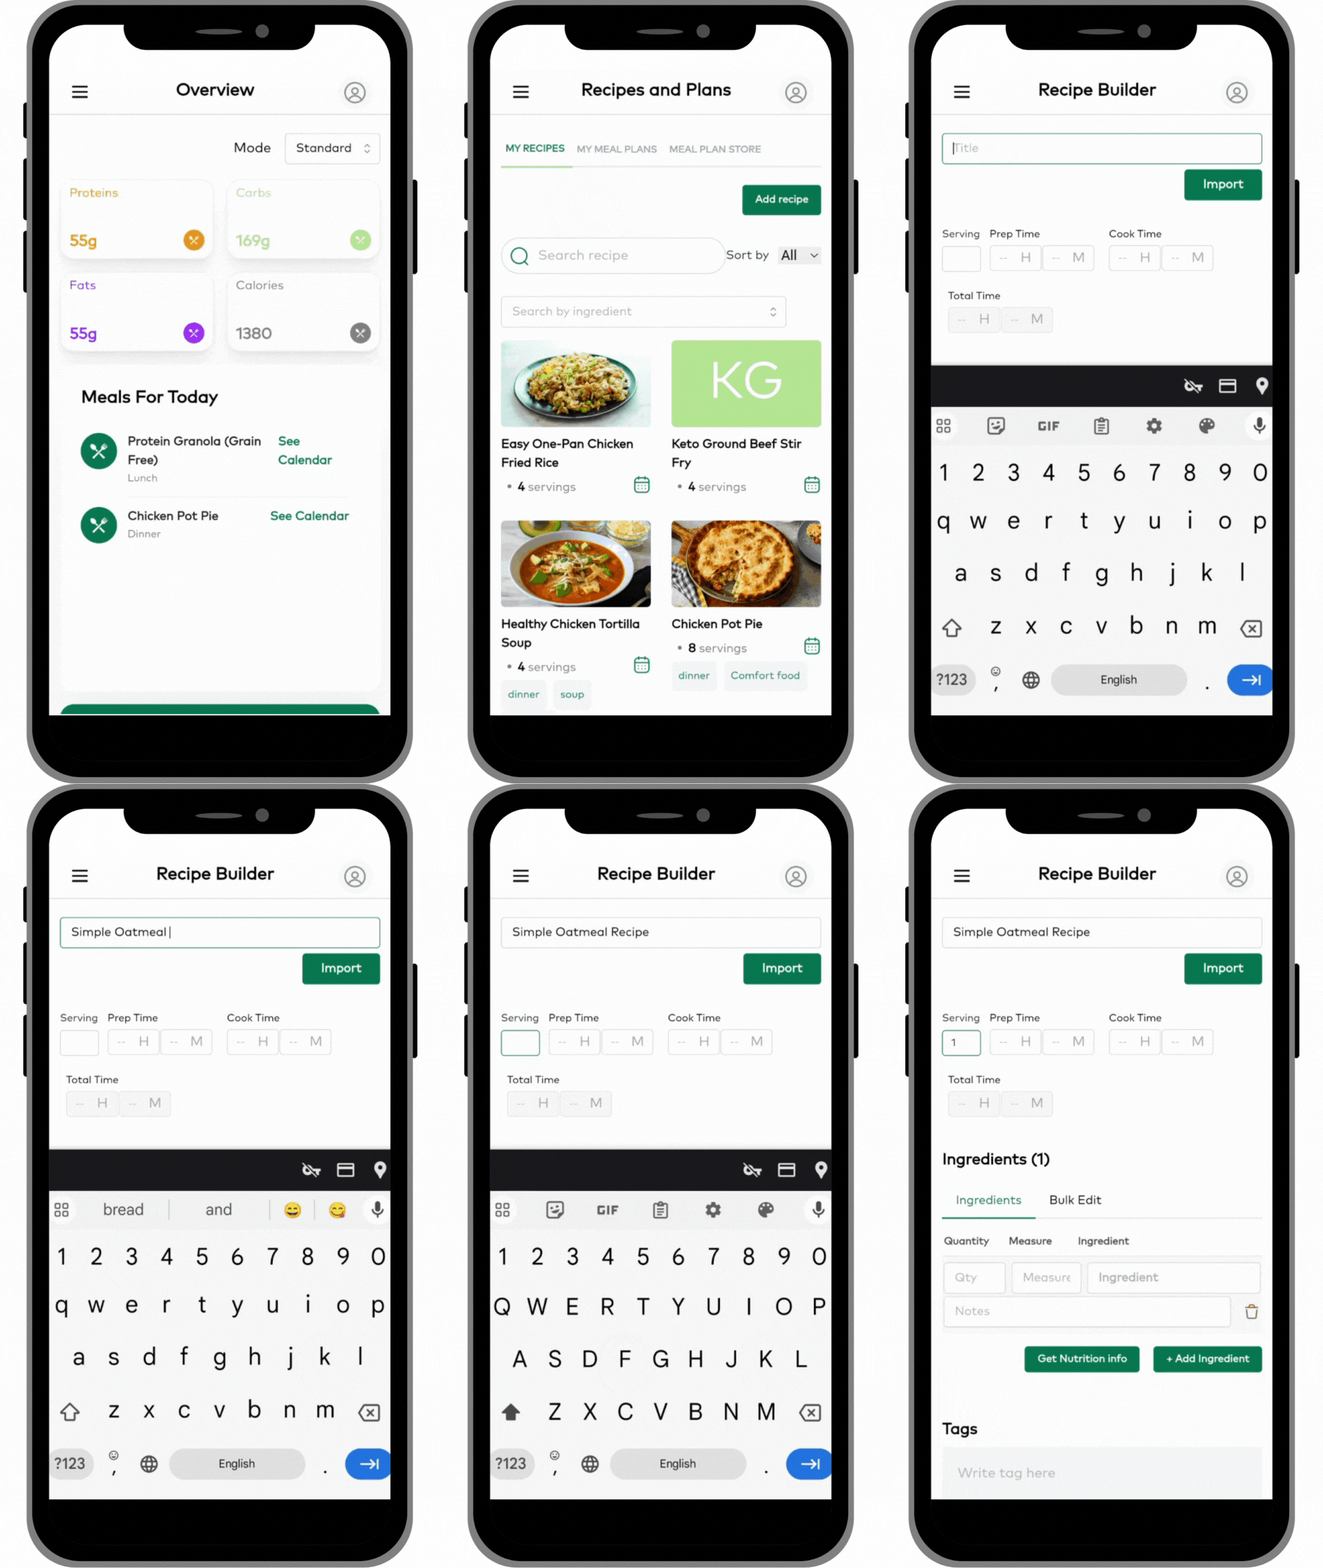
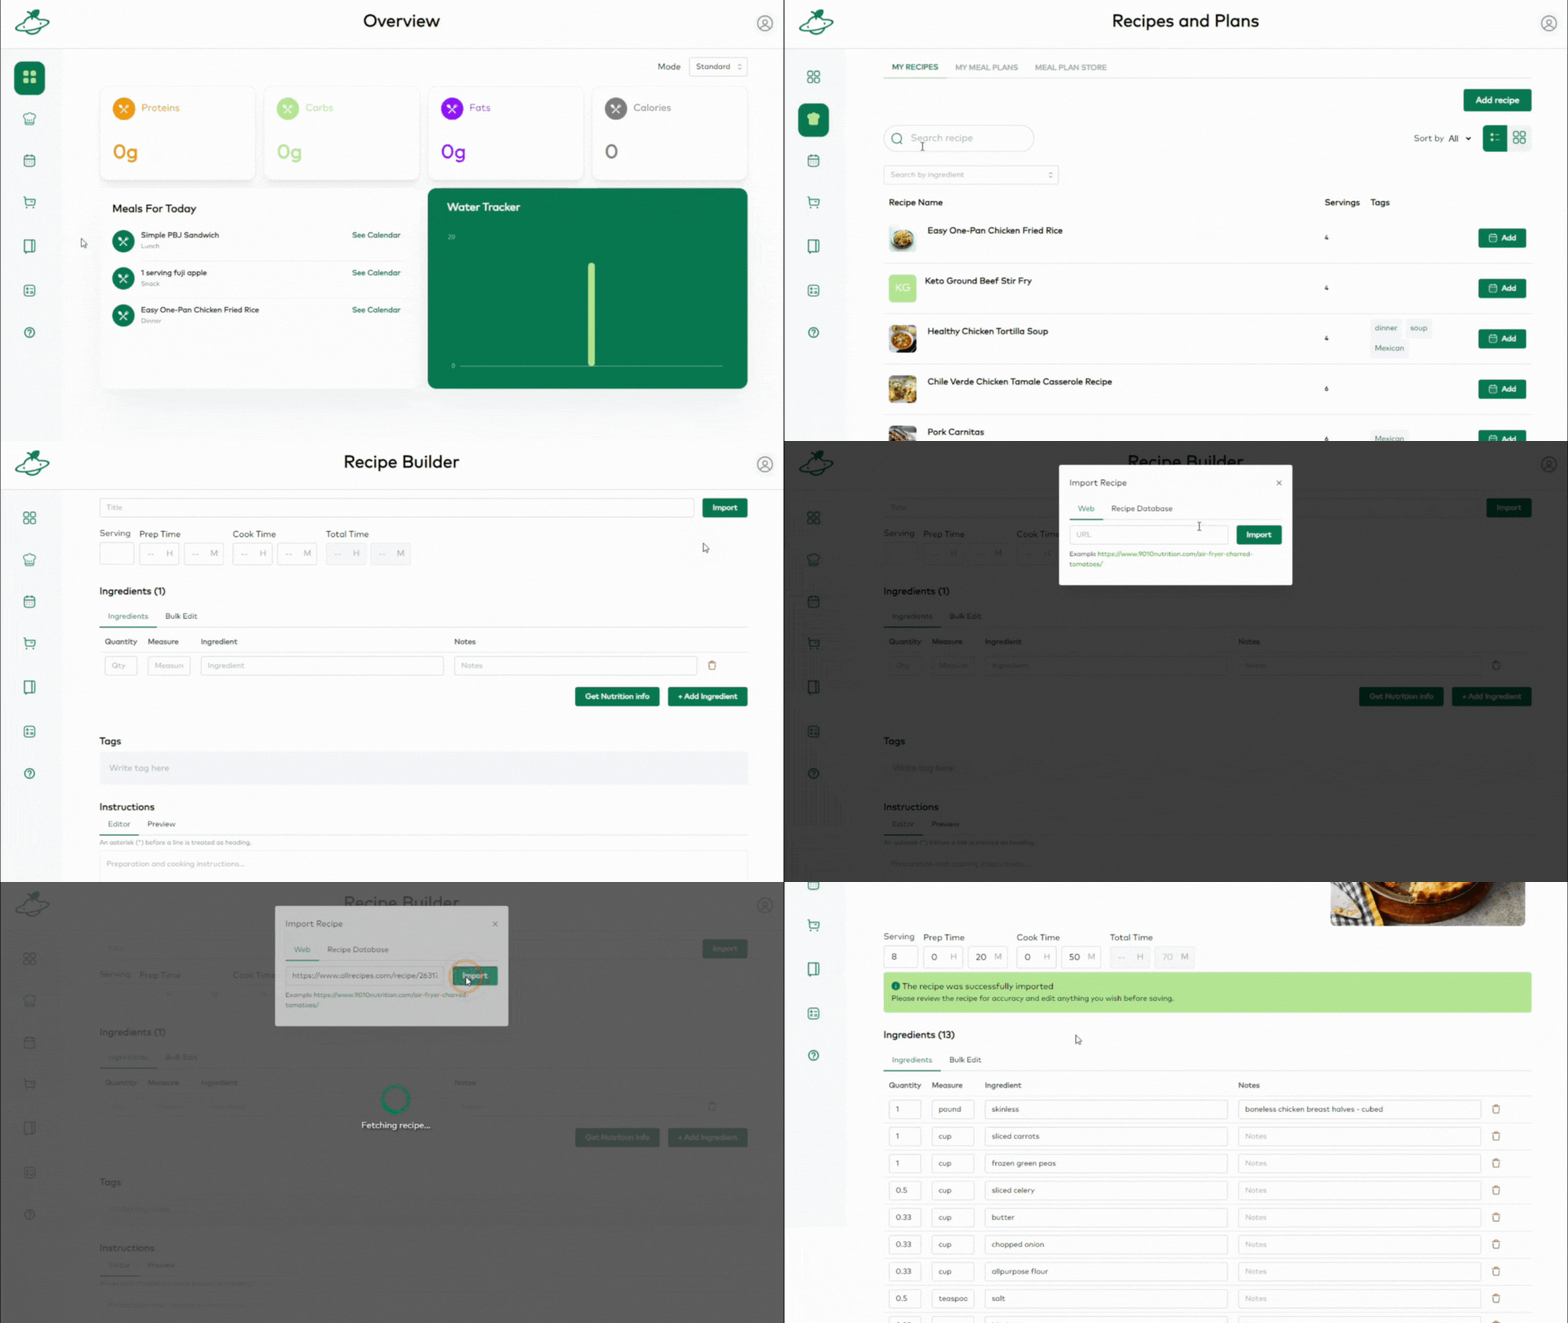
Go to the Recipes and Plans area by clicking on the Chef’s Hat icon in the main menu. Next, click on the Add Recipe button and then click on the Import button next to the title. Paste or type the url of the recipe into the box and click the Import button. The importer will fill out the recipe form for you with the information from the link you provided.
Step 2
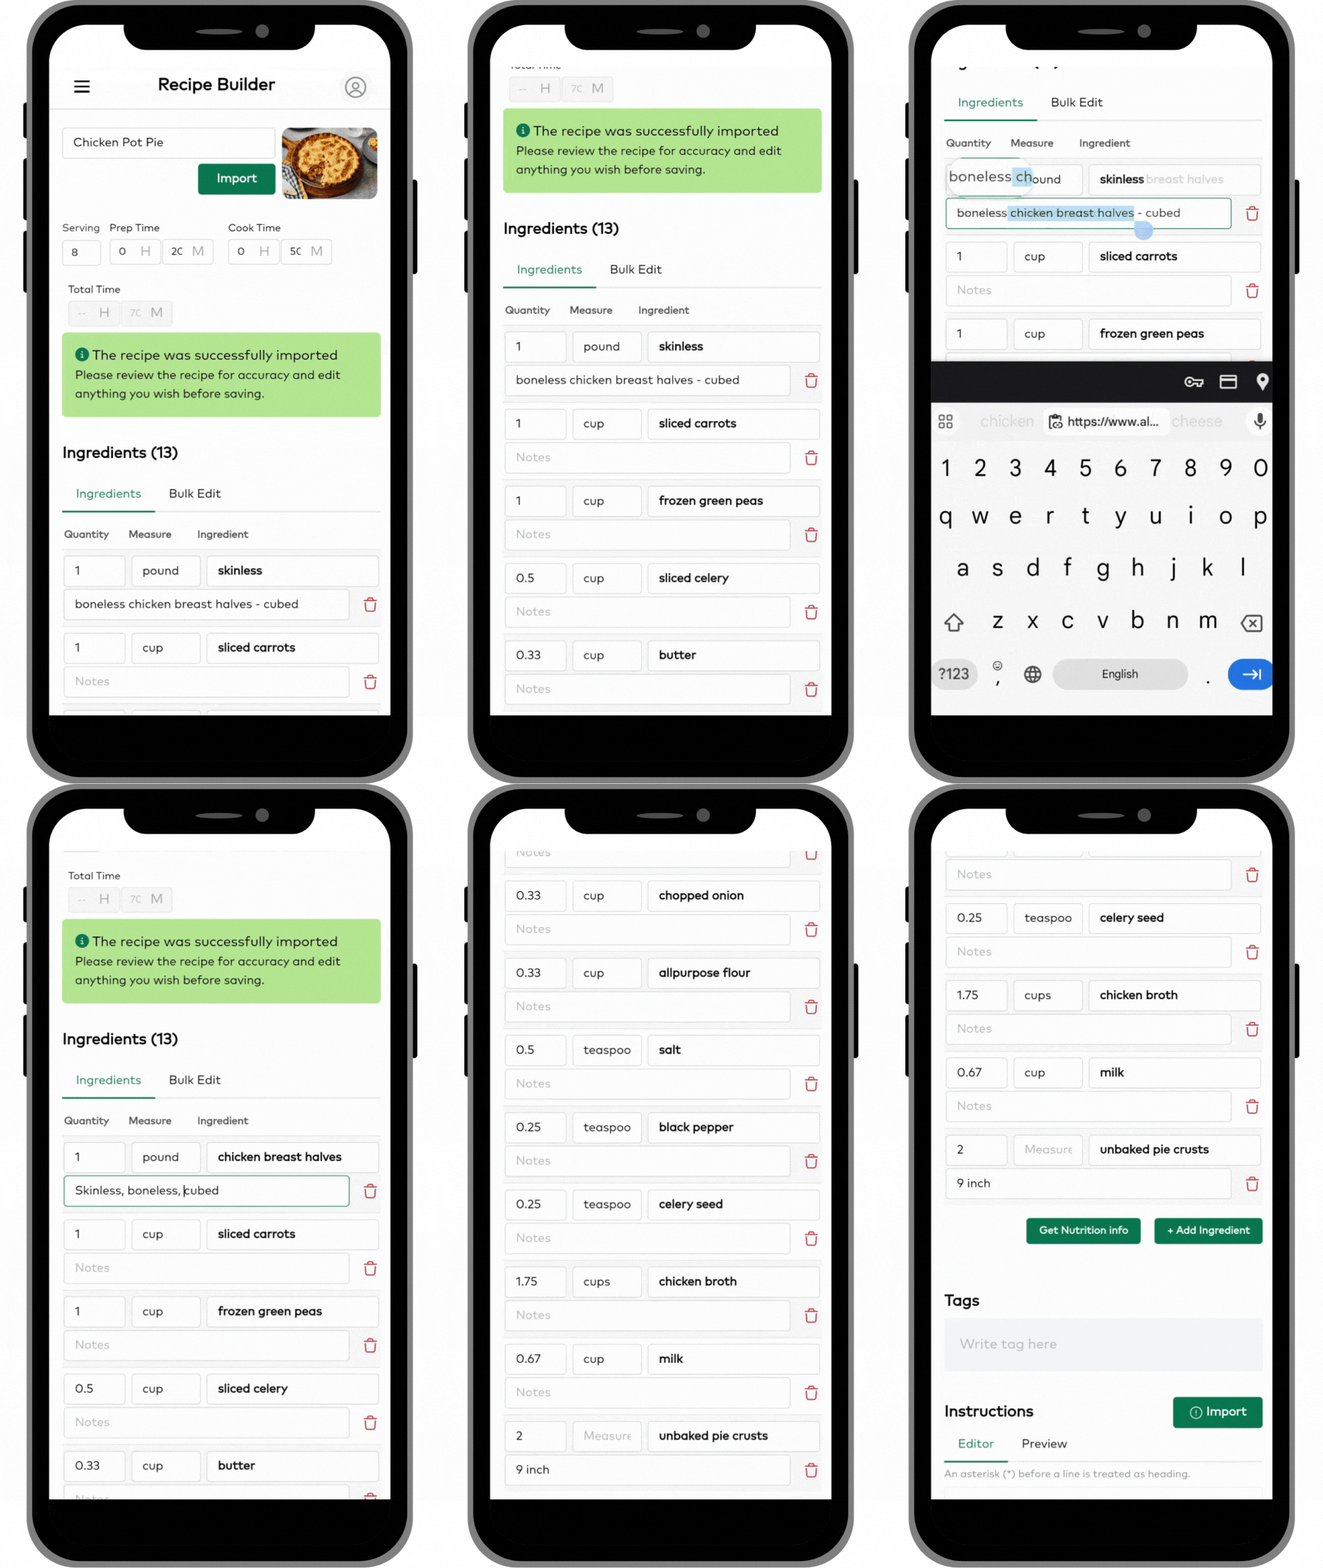
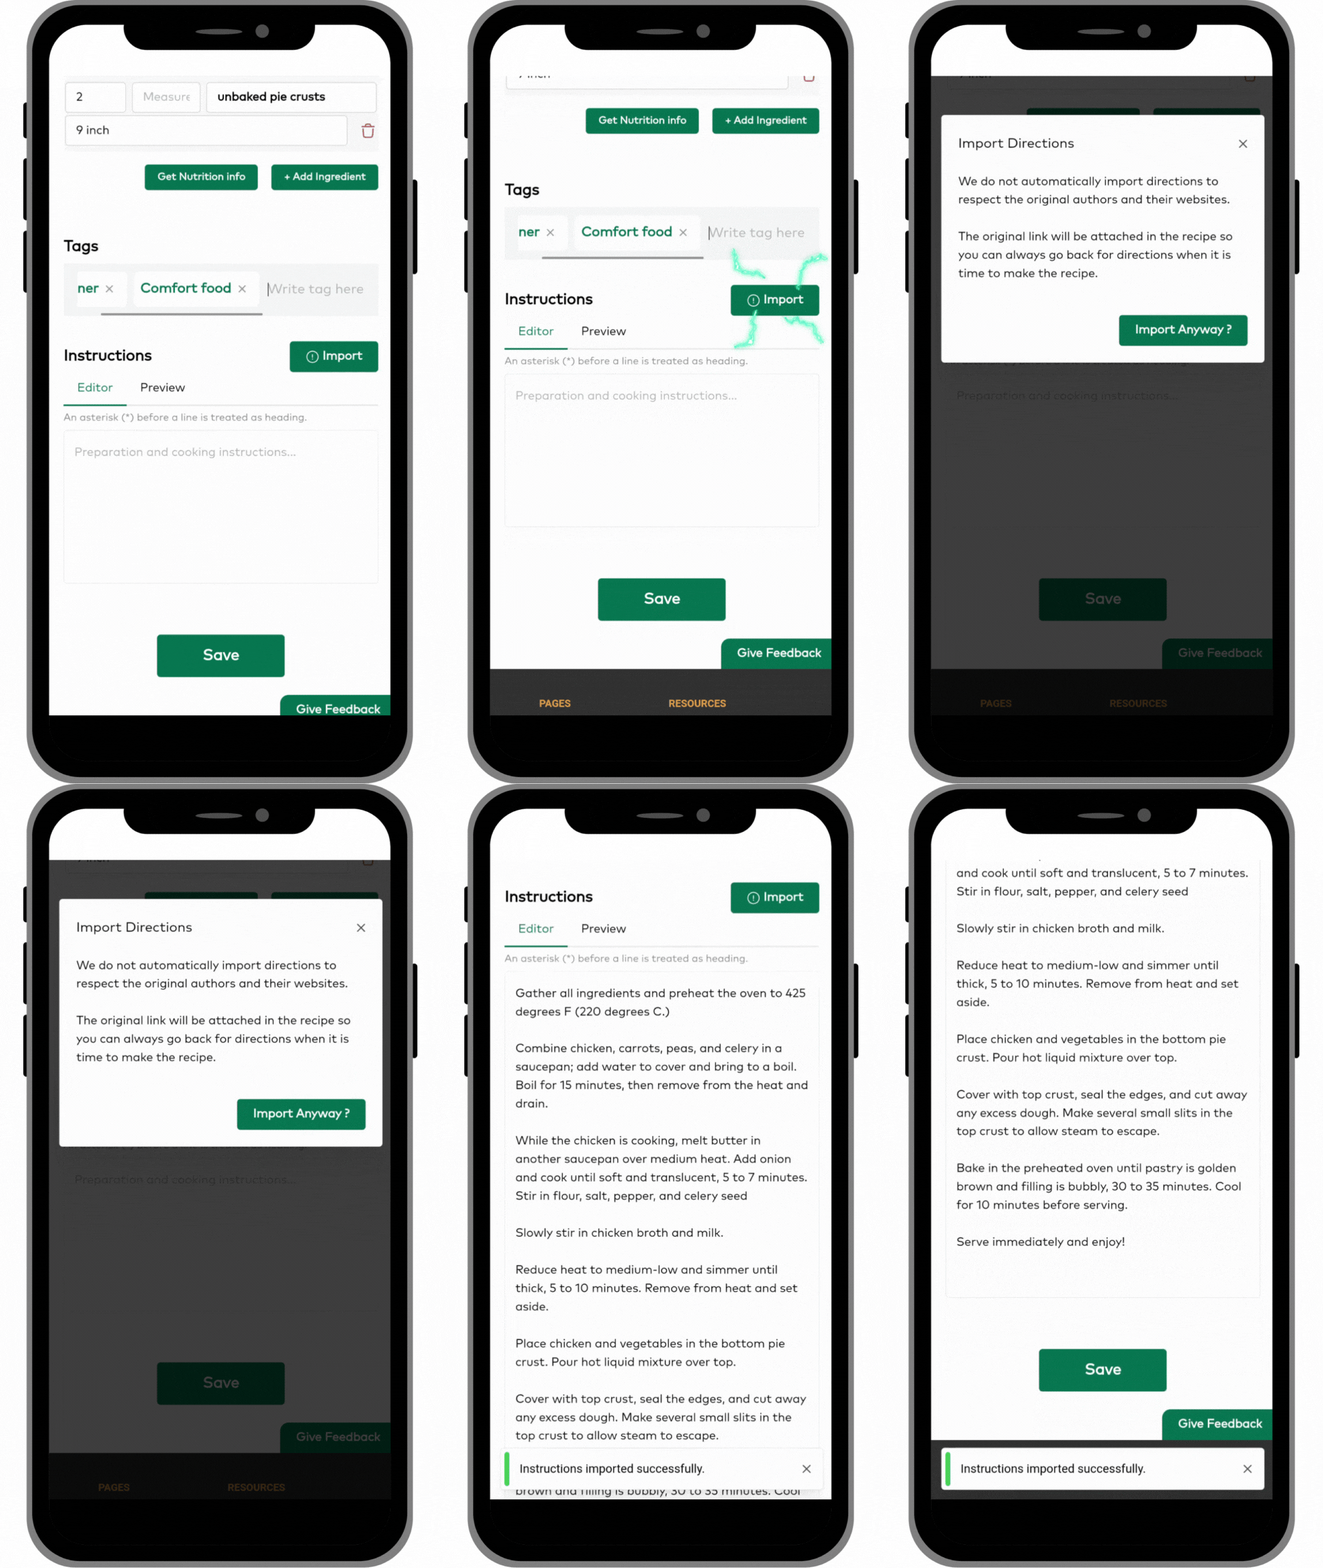
Check over all of the recipe fields and fix anything that isn’t correct. Due to the variety of ways that ingredients are entered in recipes around the web, they may not get imported correctly. Parentheses, commas, and other special characters can cause things to get put in the wrong field. You’ll see the first ingredient in the example below has some issues that need to be fixed. Make sure you fix them so all of the features of the website will work such as nutrition information.
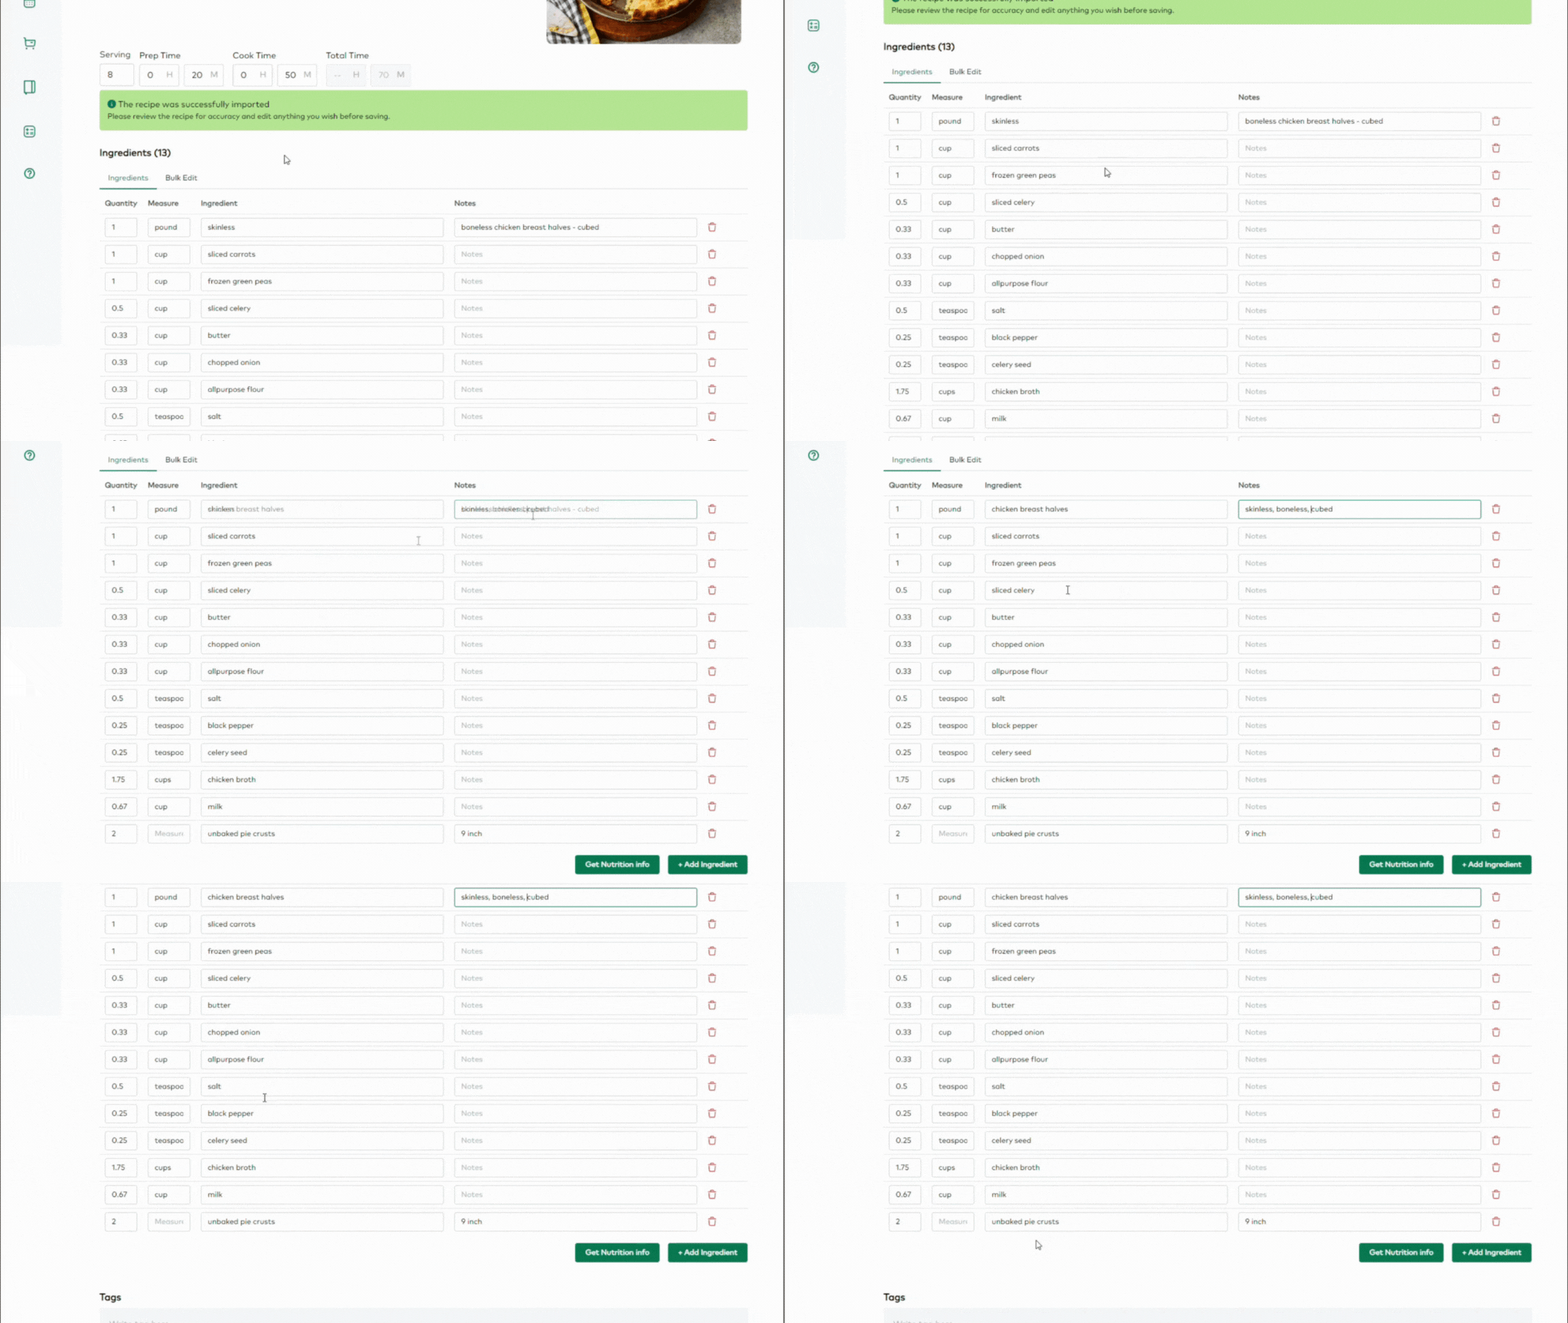
Step 3
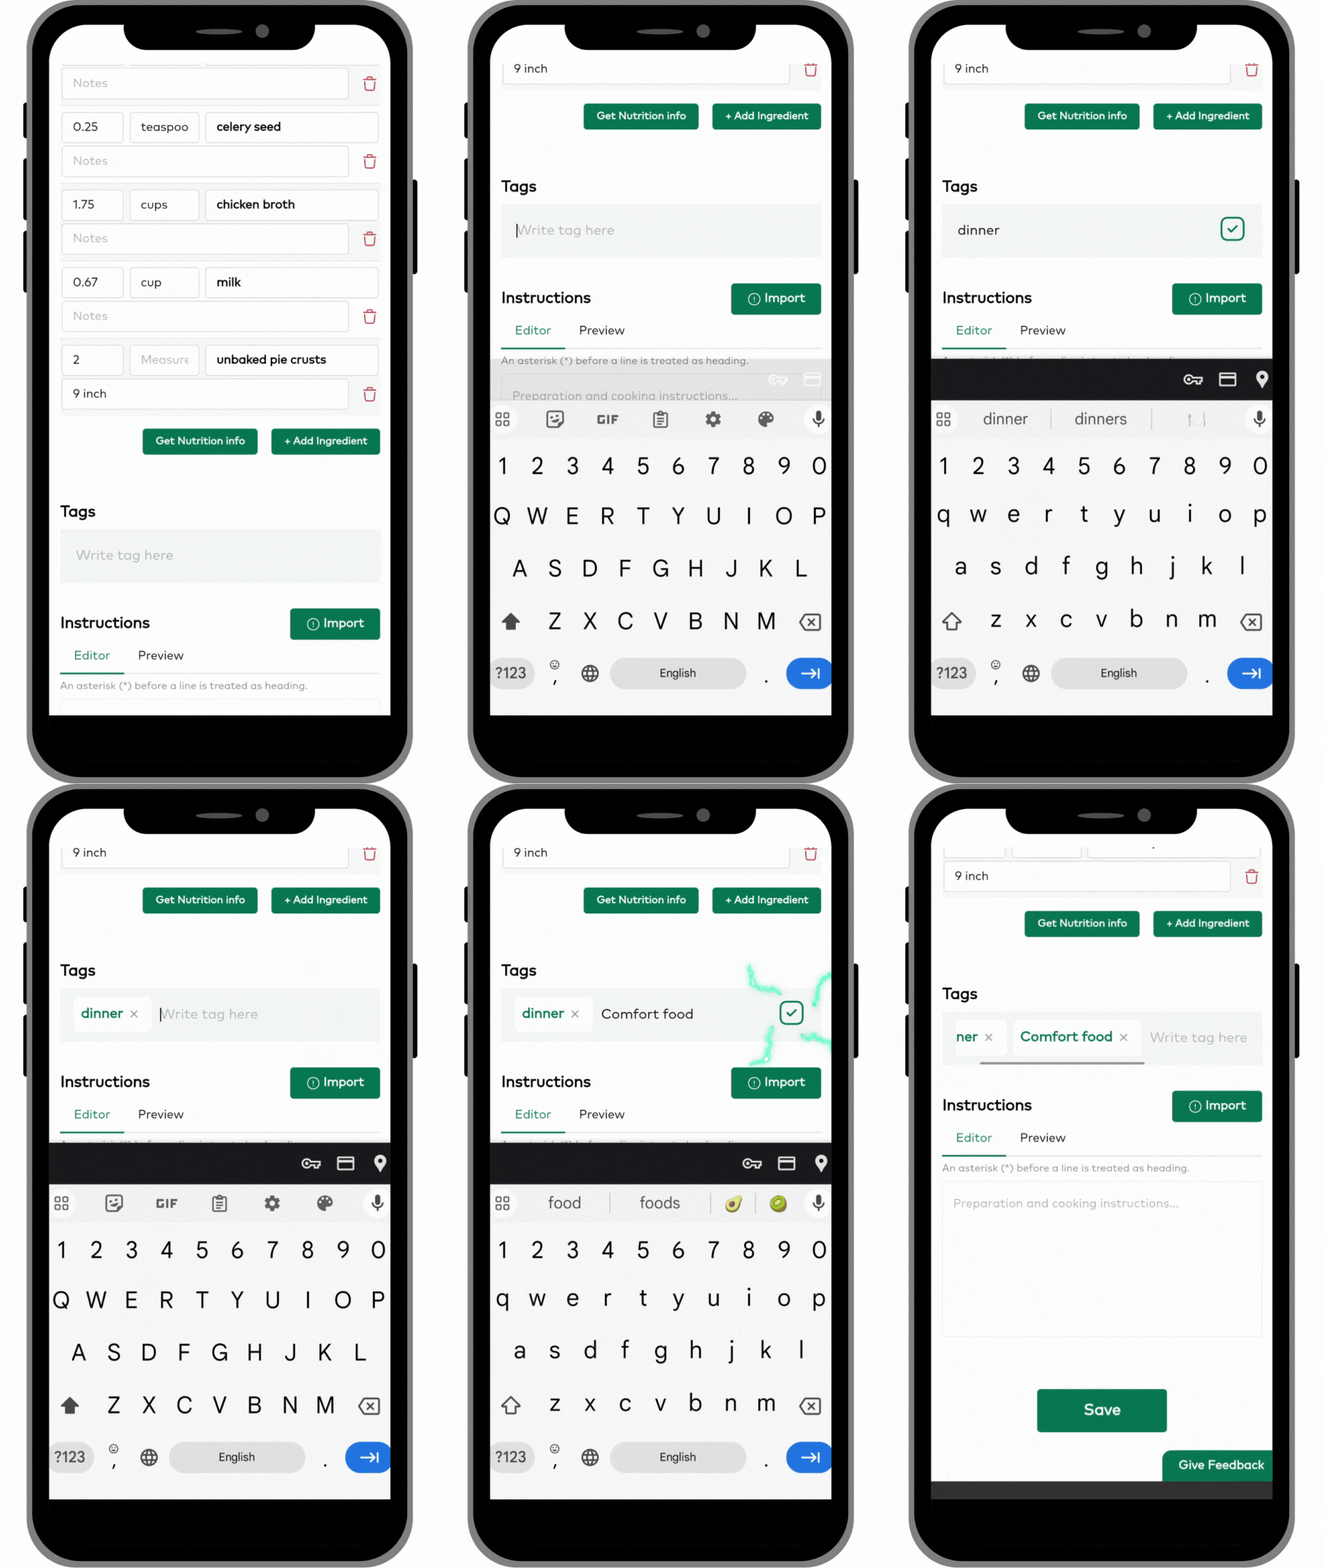
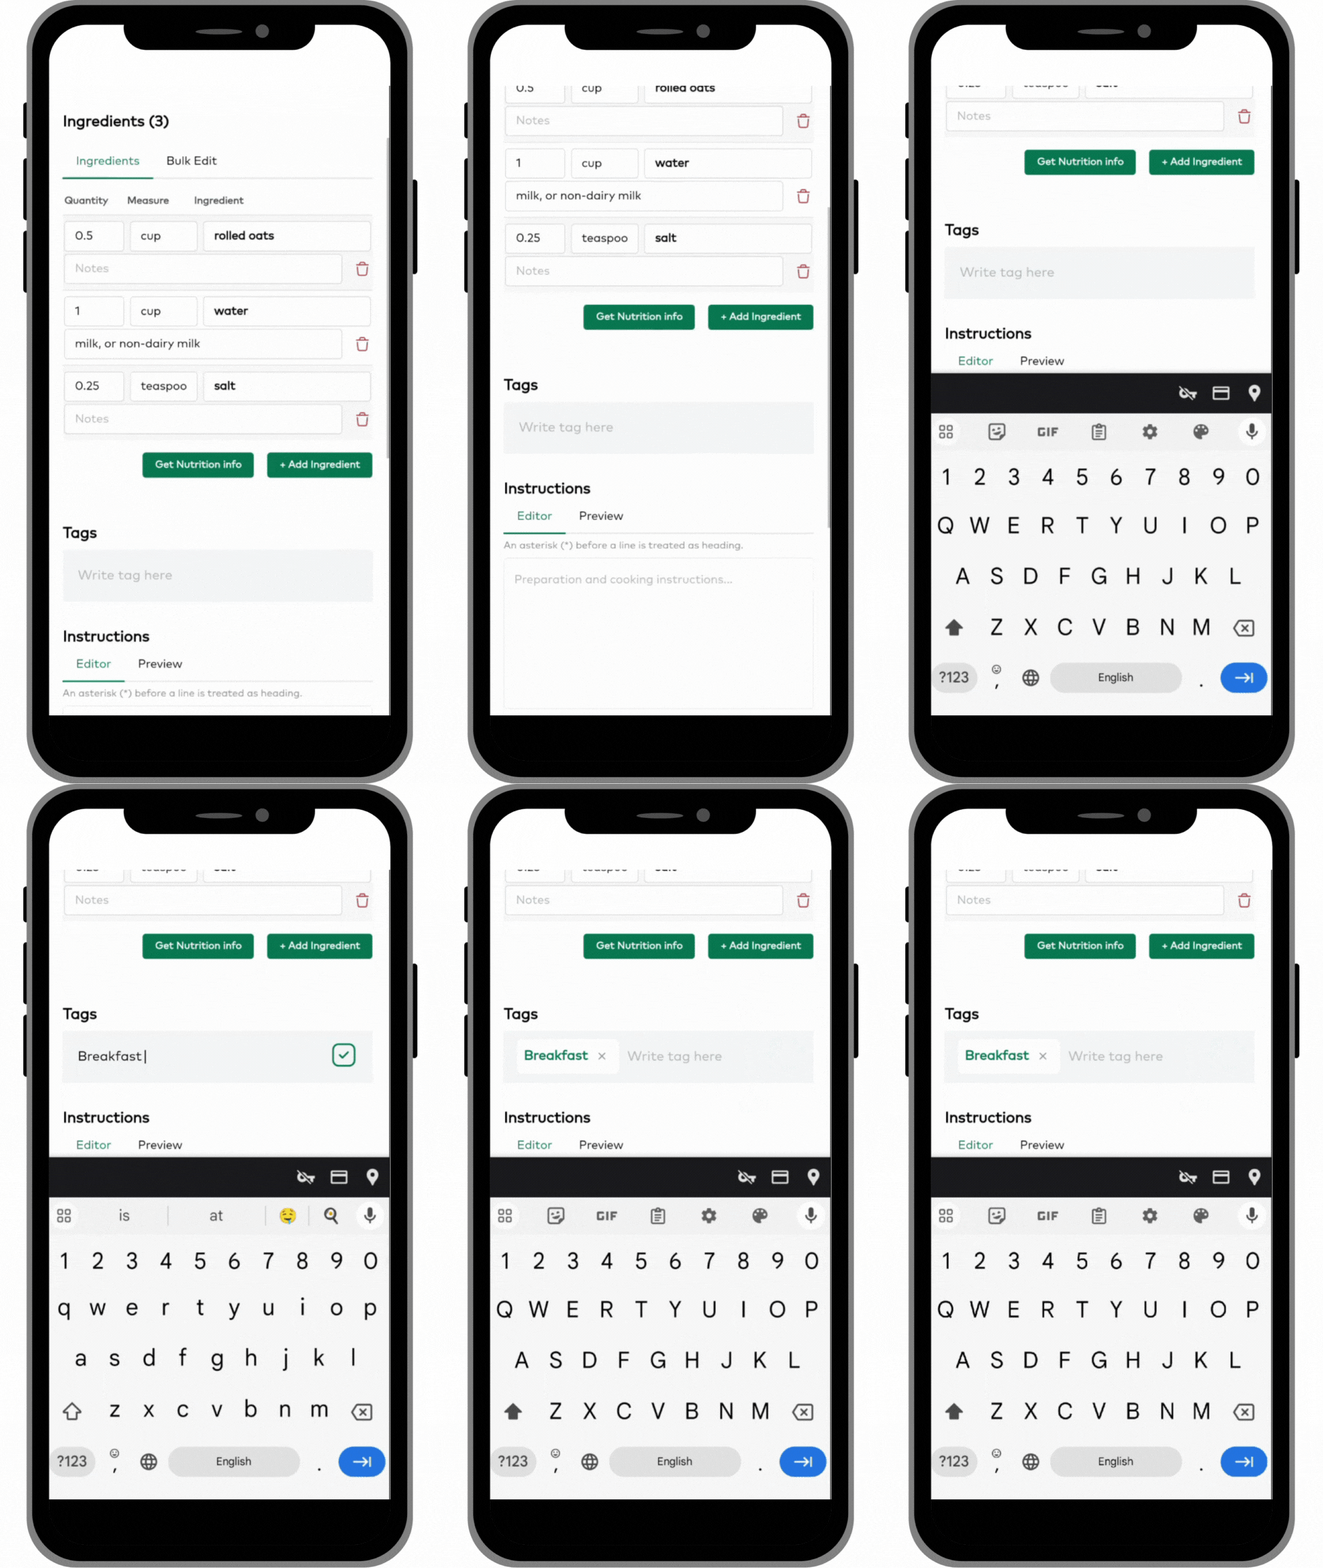
Add tags to your recipe (optional). This will help you find and organize your recipes. Simply type your tag and then click enter or press the check mark on mobile for each one.
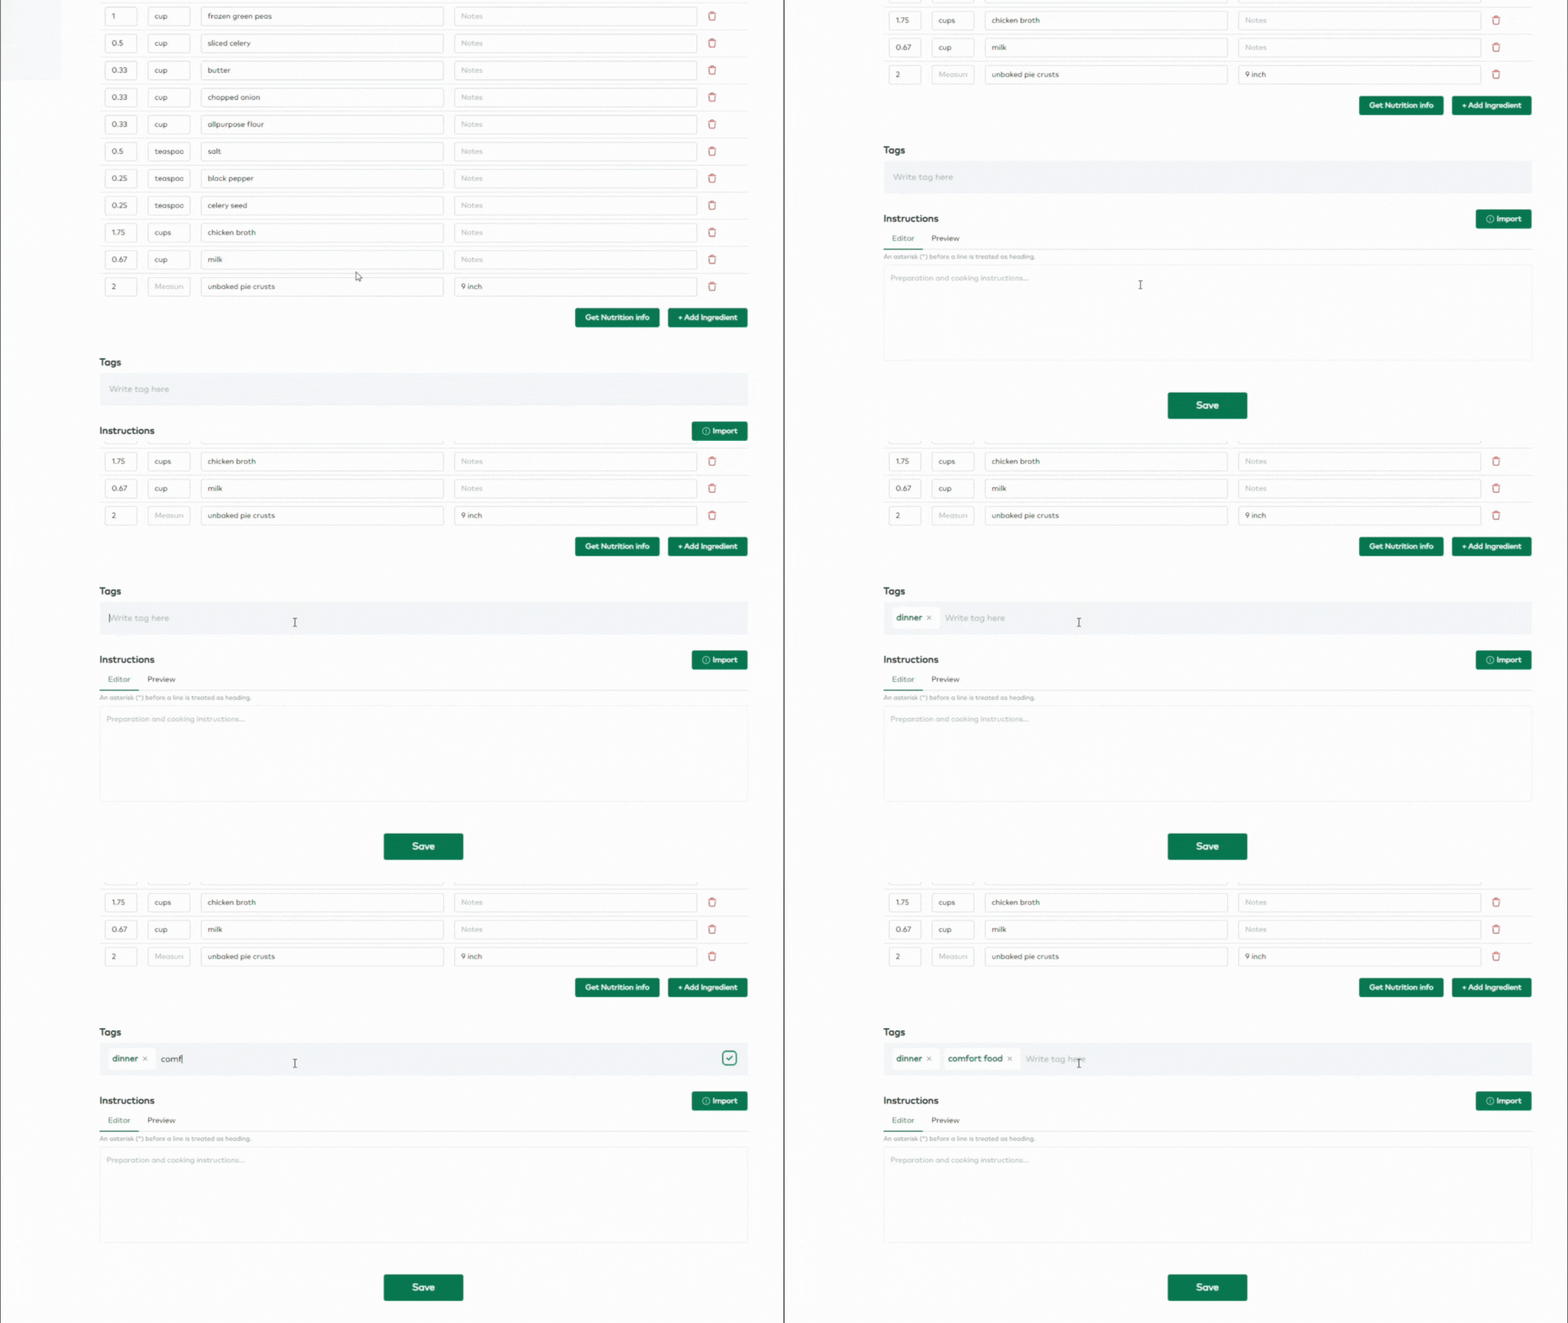
Step 4
Import the recipe directions, if you desire. You’ll notice that we do not import the recipe directions automatically. This is because recipe bloggers make their living from traffic to their site and we believe we should all respect that. The directions are not needed for shopping list generation or nutrition information. So, we recommend that you leave the directions out and simply click the link to the original website when you need the directions. You can choose to import them anyway, if you would like.
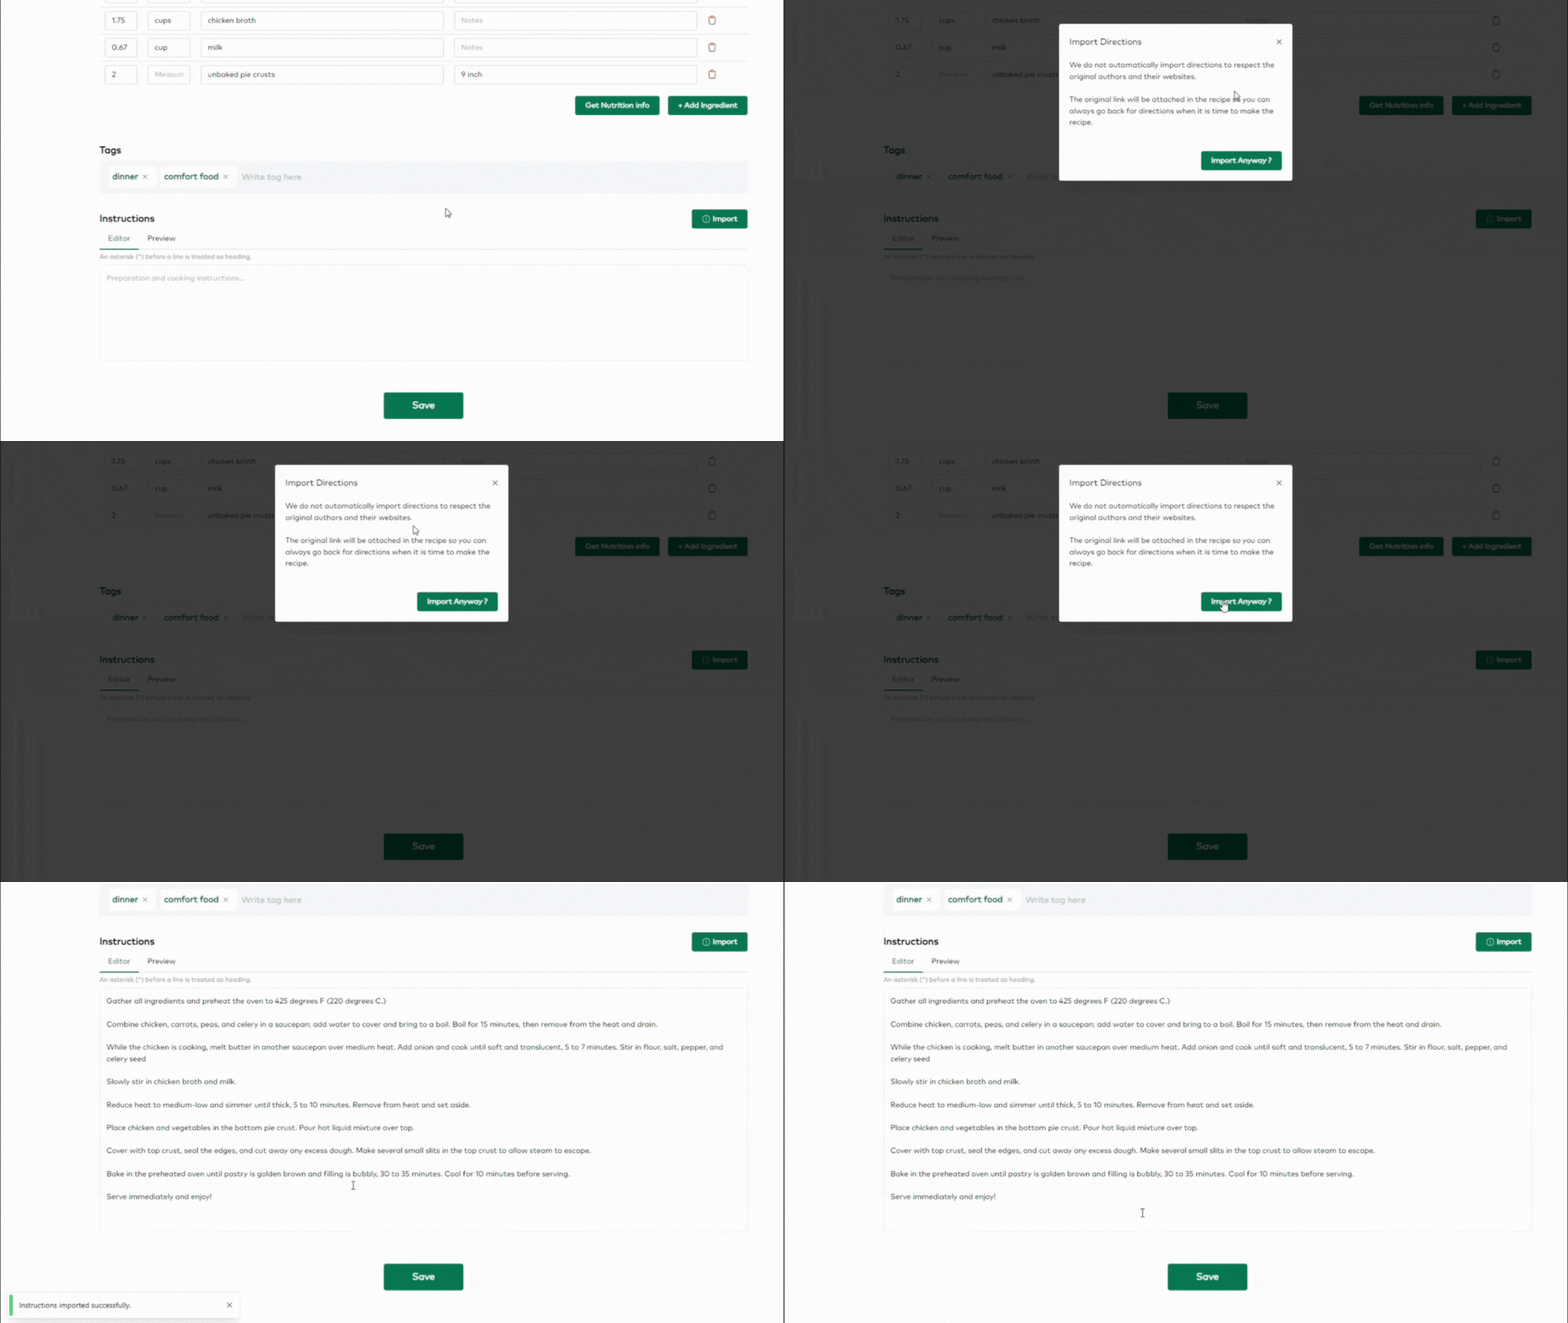
Step 5
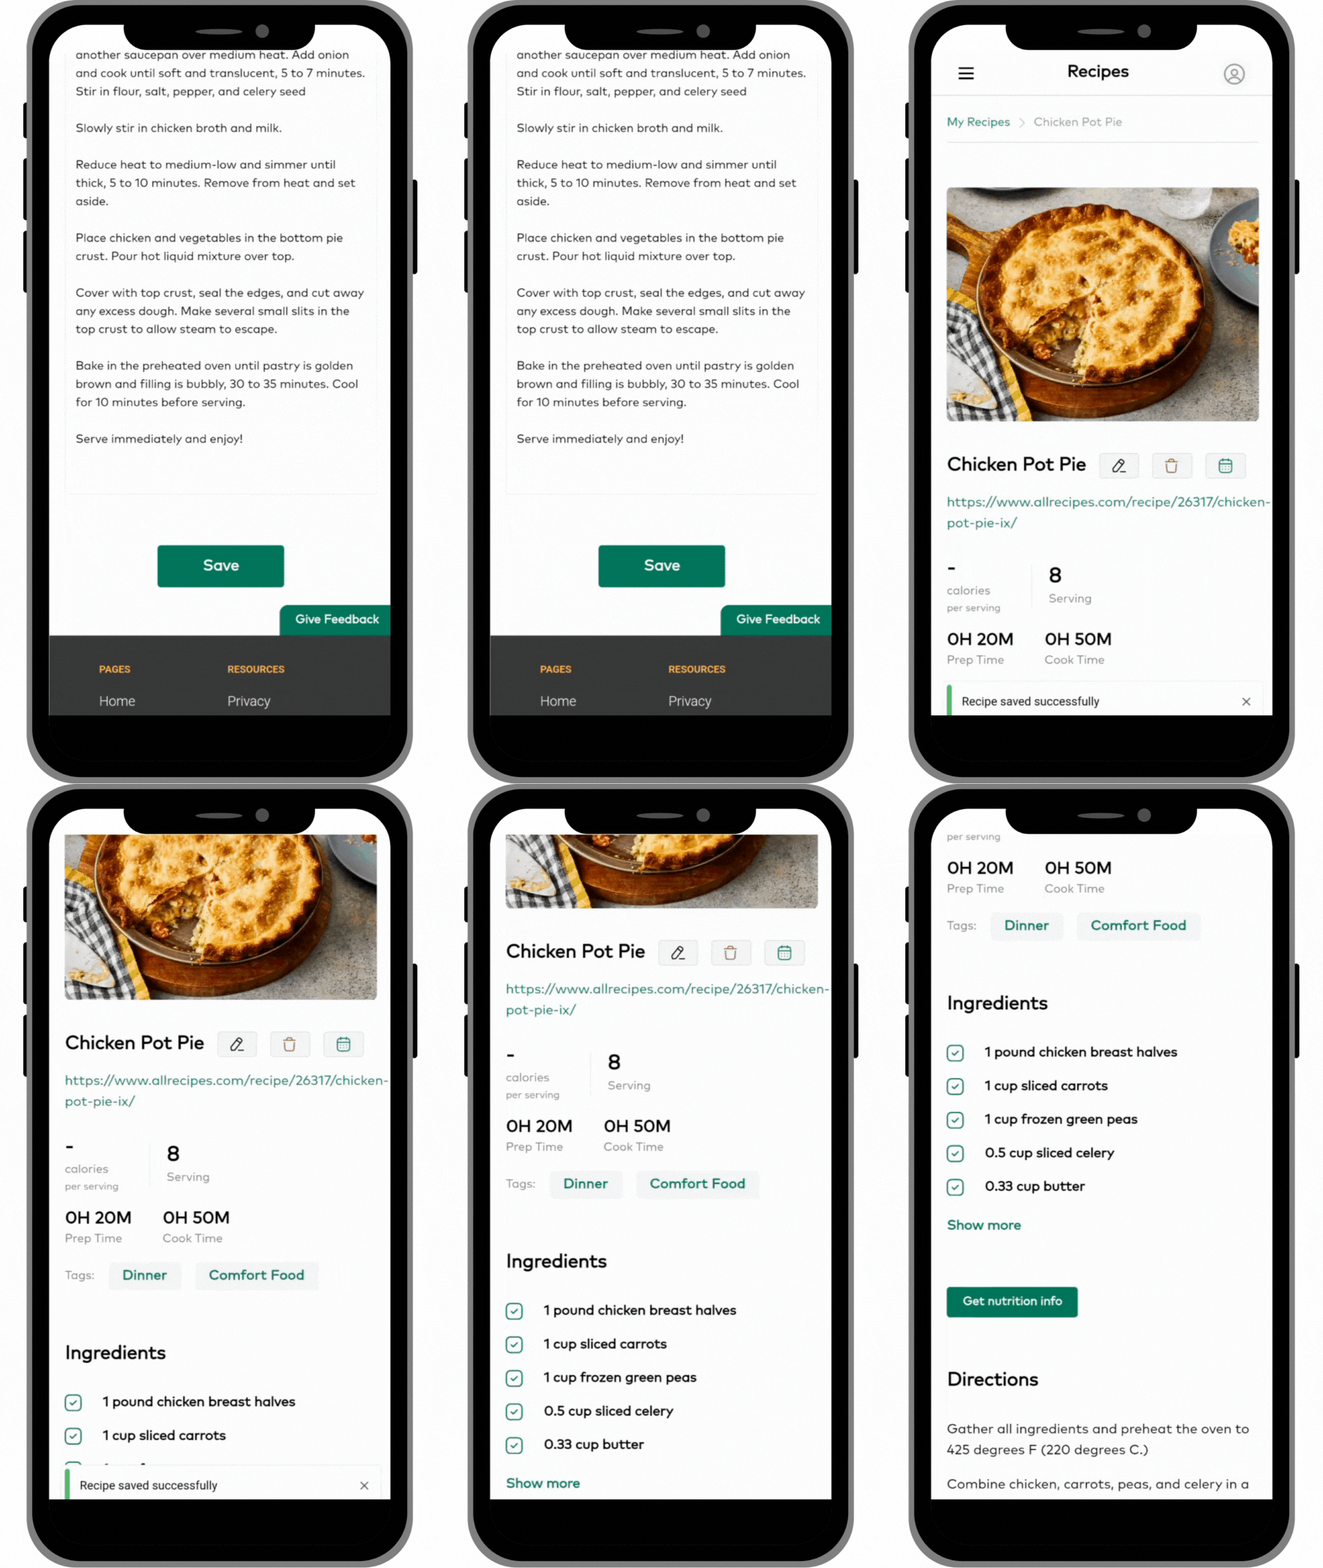
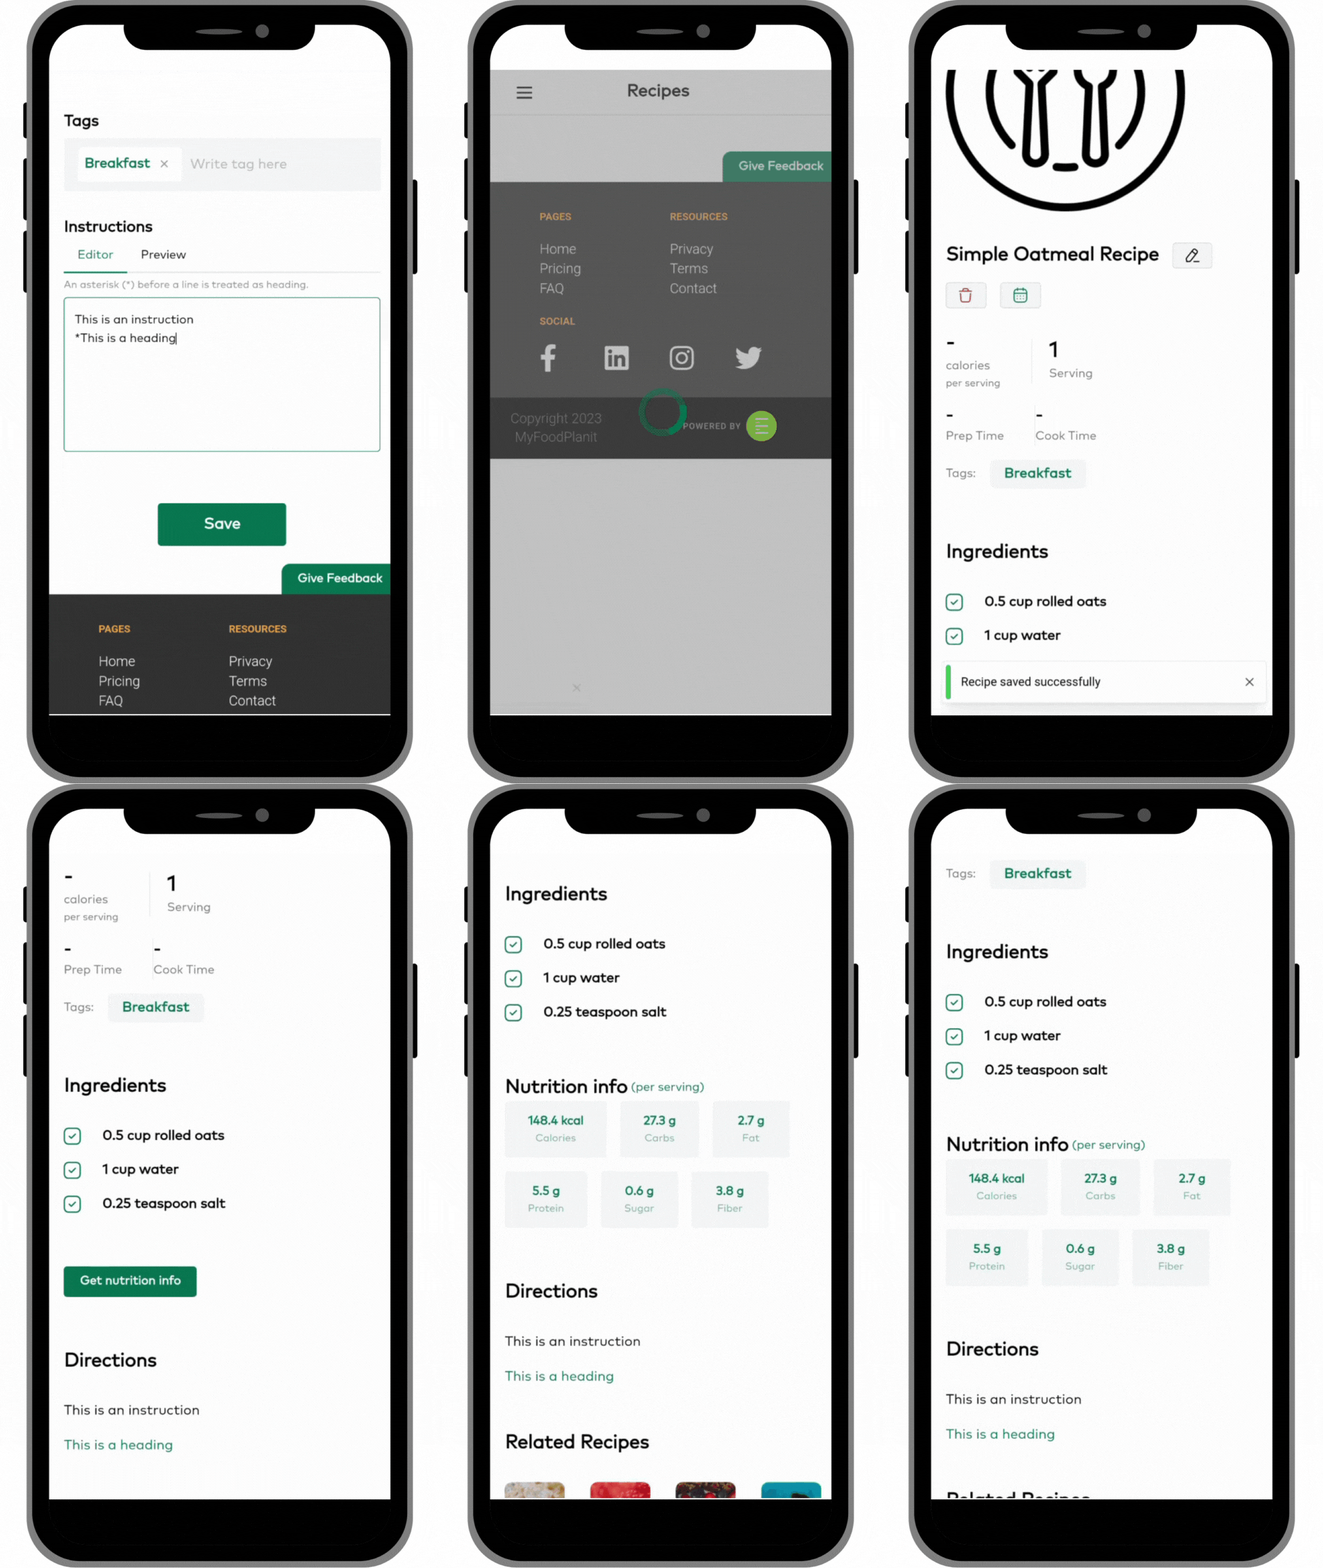
Click the Save button and then check your recipe. You’ll see that the original link is there for you as well as a button to pull the nutritional information if you’d like. Your recipe is now ready to add to your meal plan calendar or your food diary.
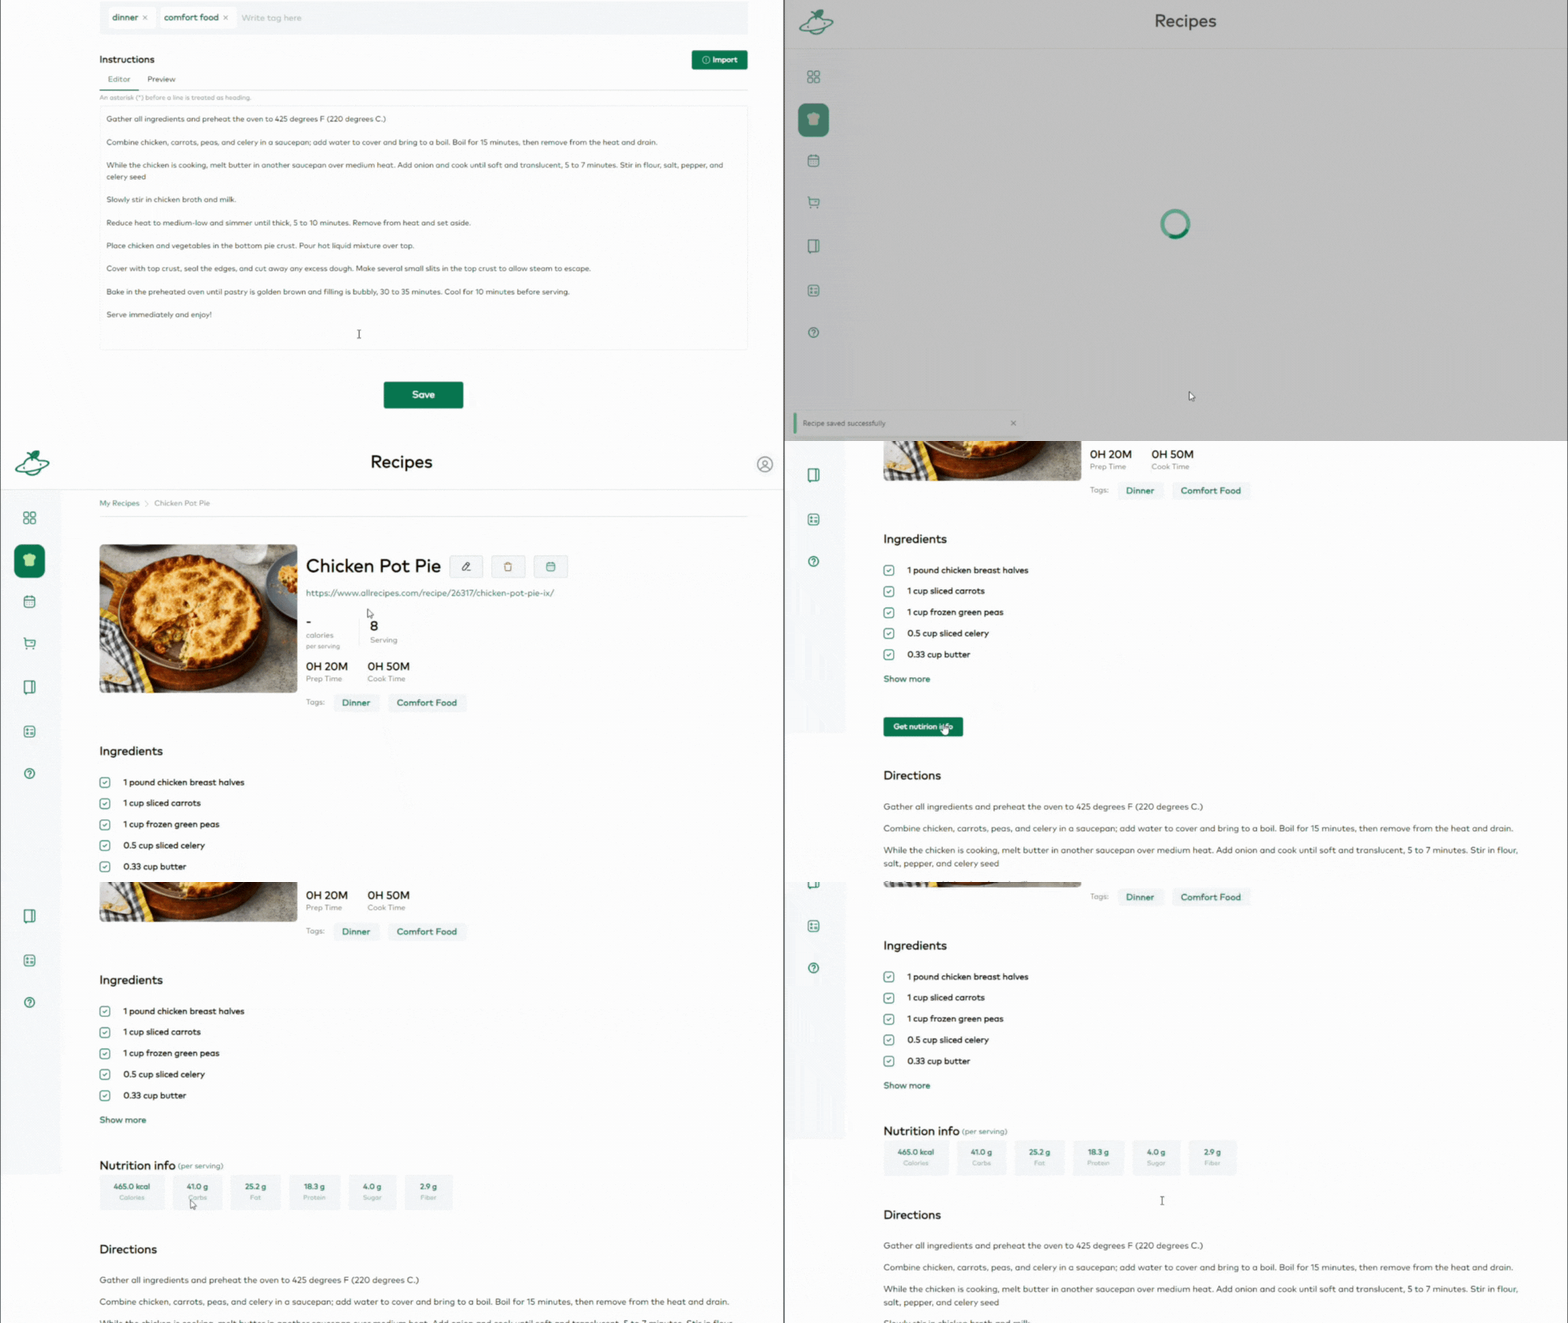
Add A Recipe Manually
Step 1
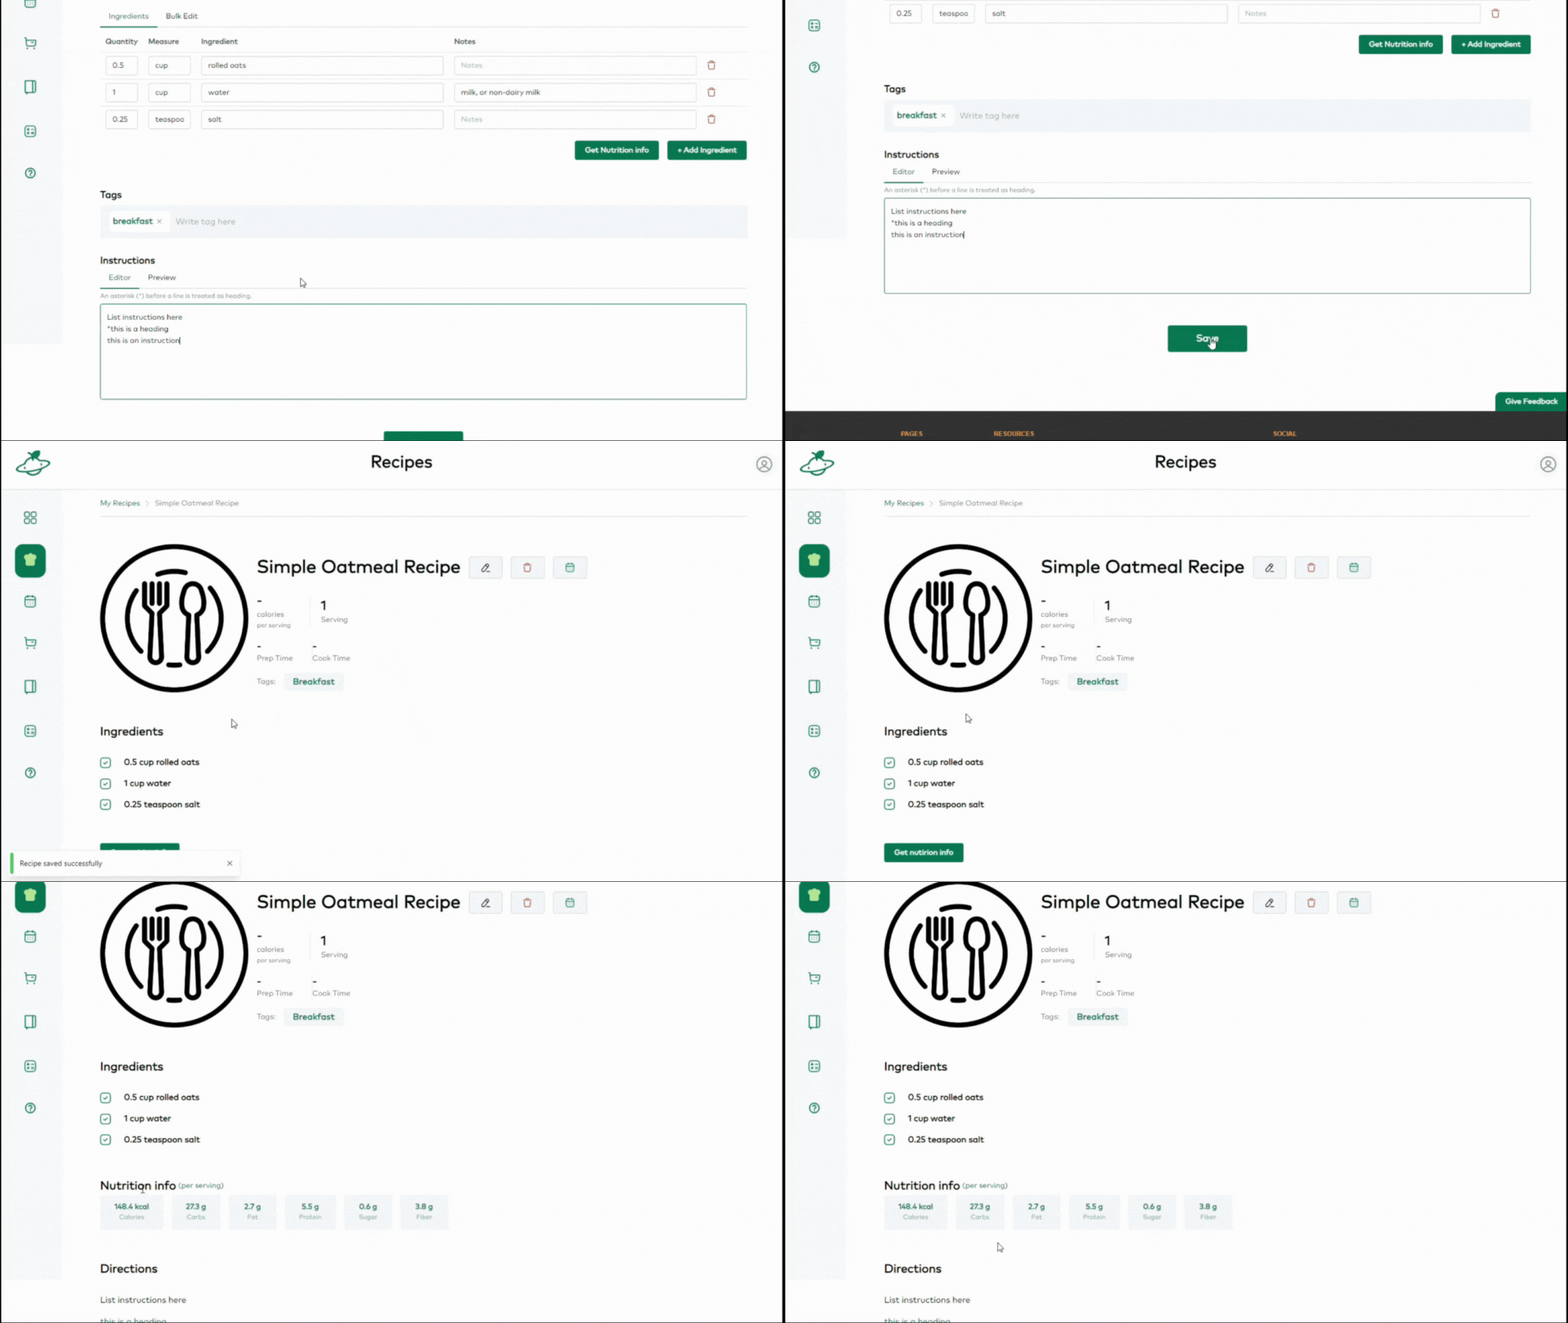
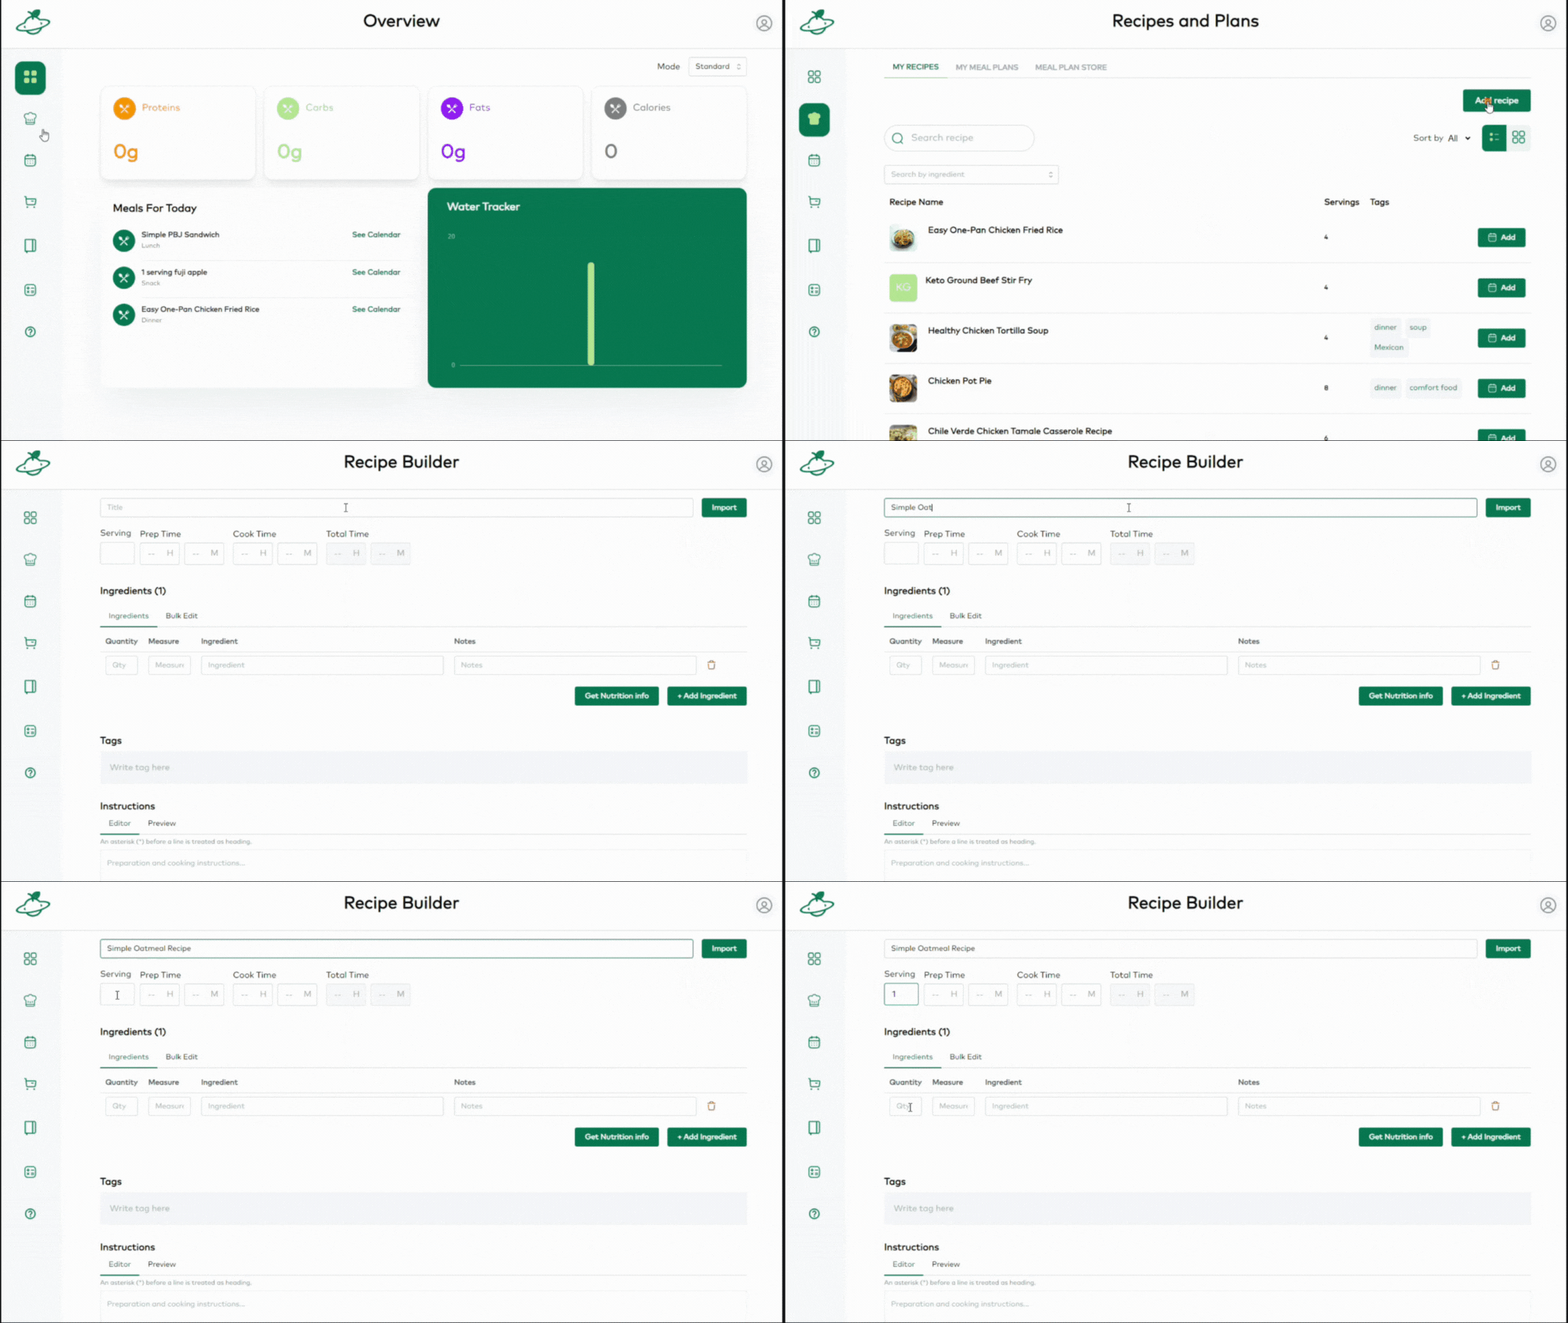
To add a recipe manually, go to the Recipes and Plans area by clicking on the Chef’s Hat icon in the main menu. Click on the Add Recipe button. Now, just fill out the form manually. You can start by adding a title and number of servings.
Step 2
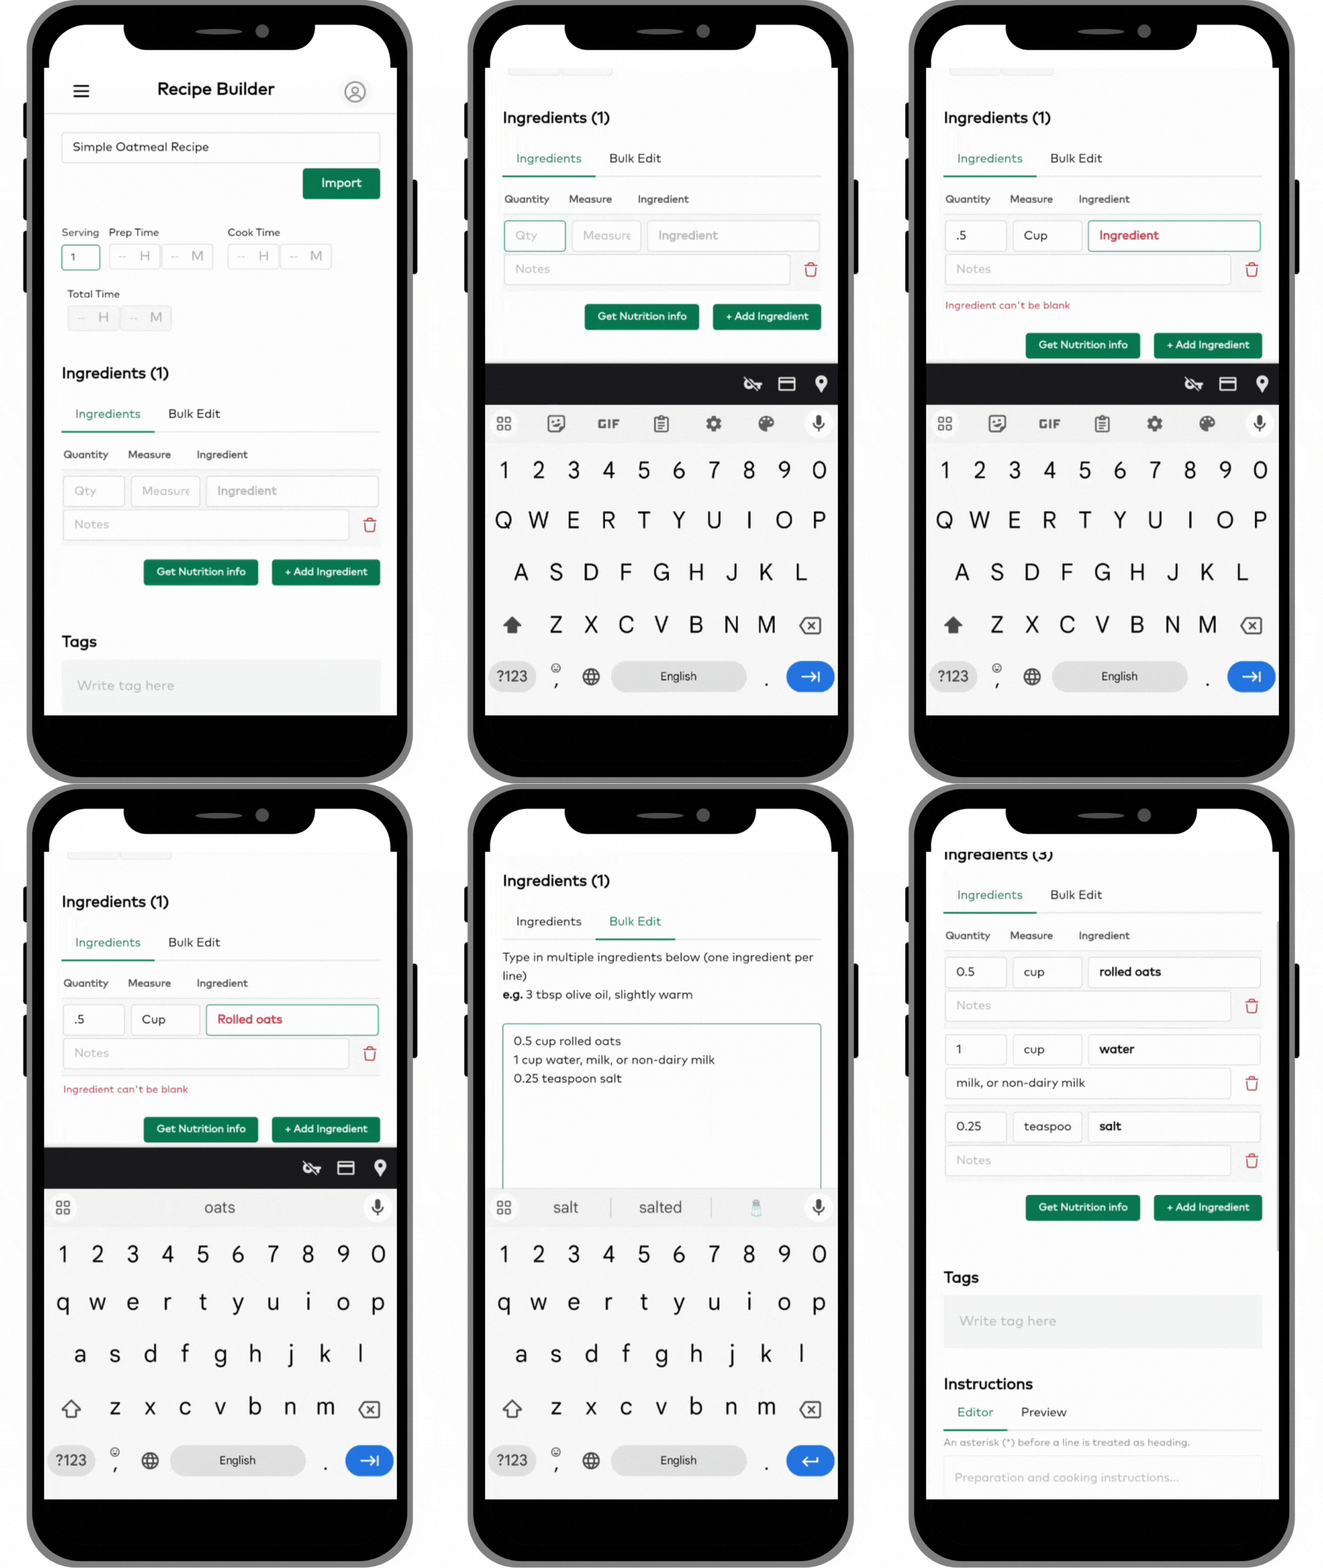
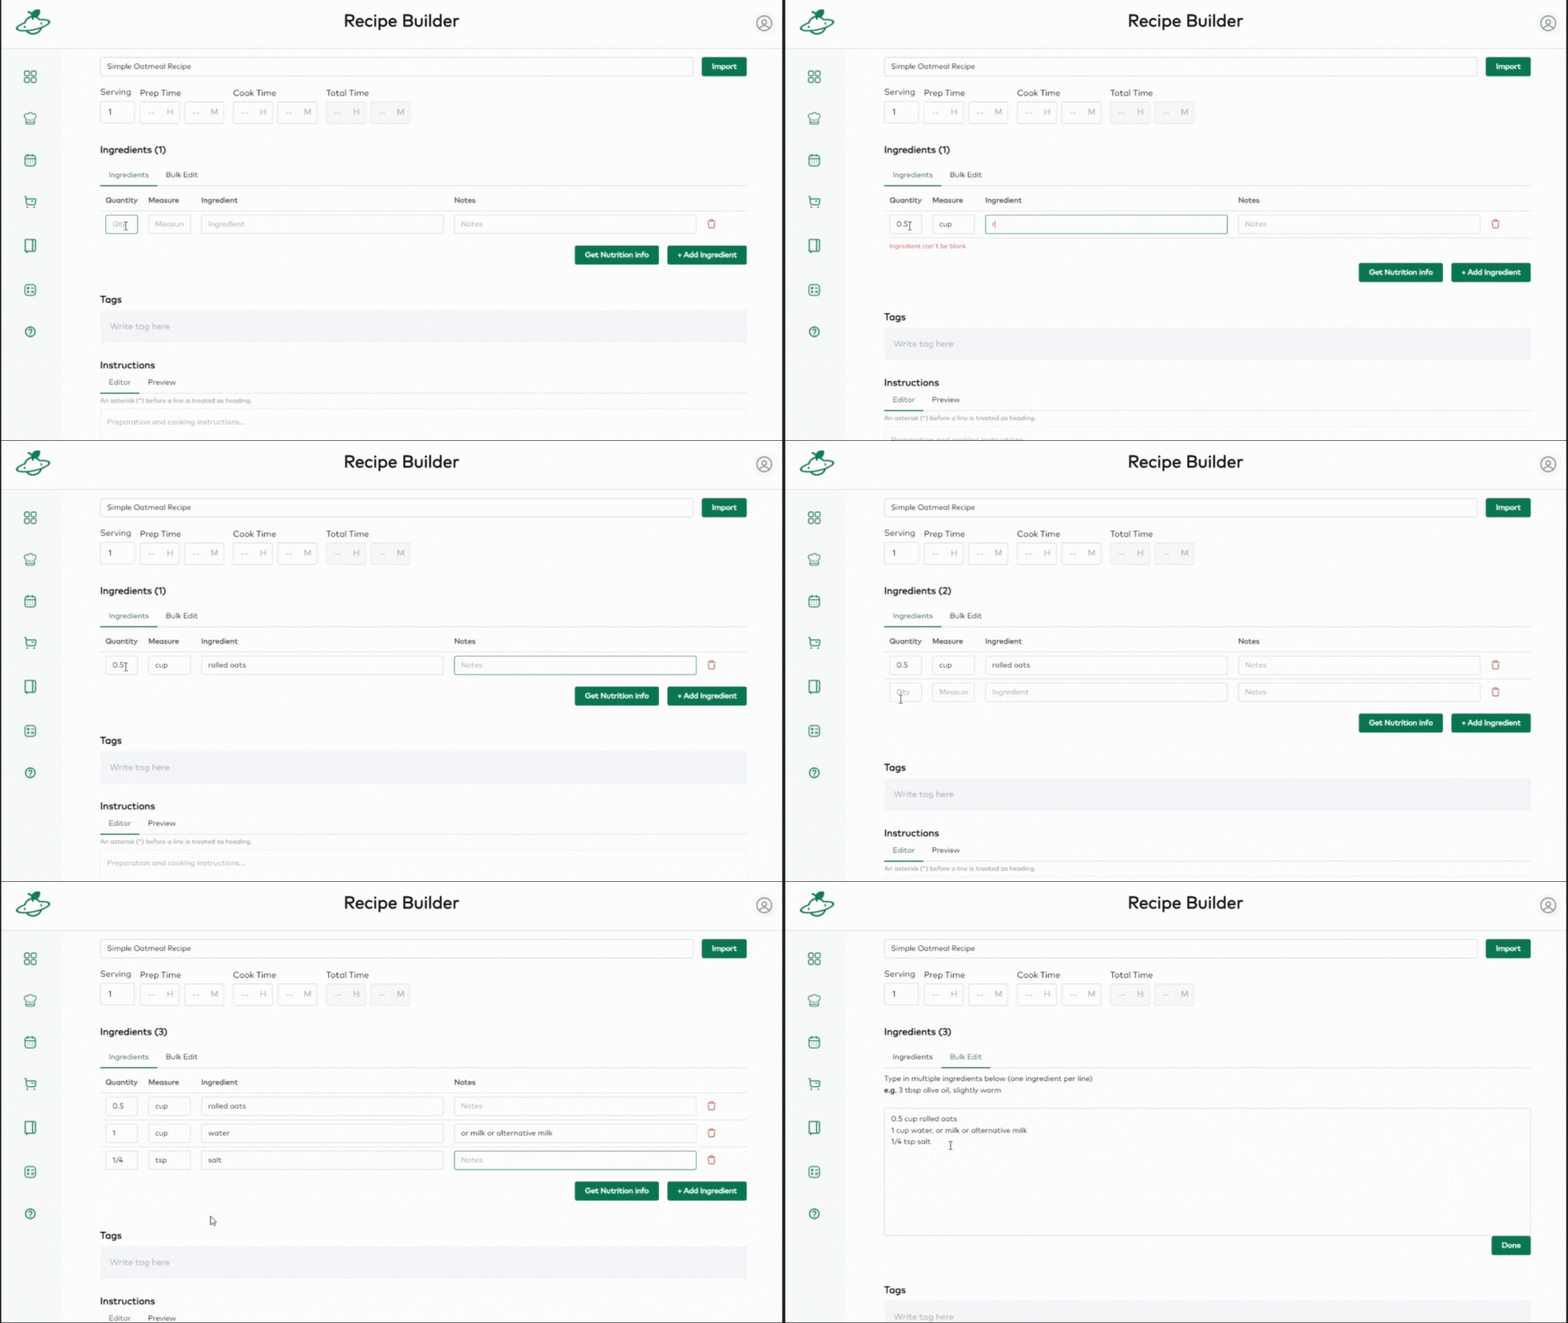
Fill out the ingredients. You can either enter the ingredients one by one by filling out the various fields and adding another ingredient, or you can use the bulk edit tab to either paste a list of ingredients or type them in. If you choose to use the bulk edit tab, make sure you switch over to the ingredients tab and check that your ingredients were properly separated into the correct fields.
Step 3
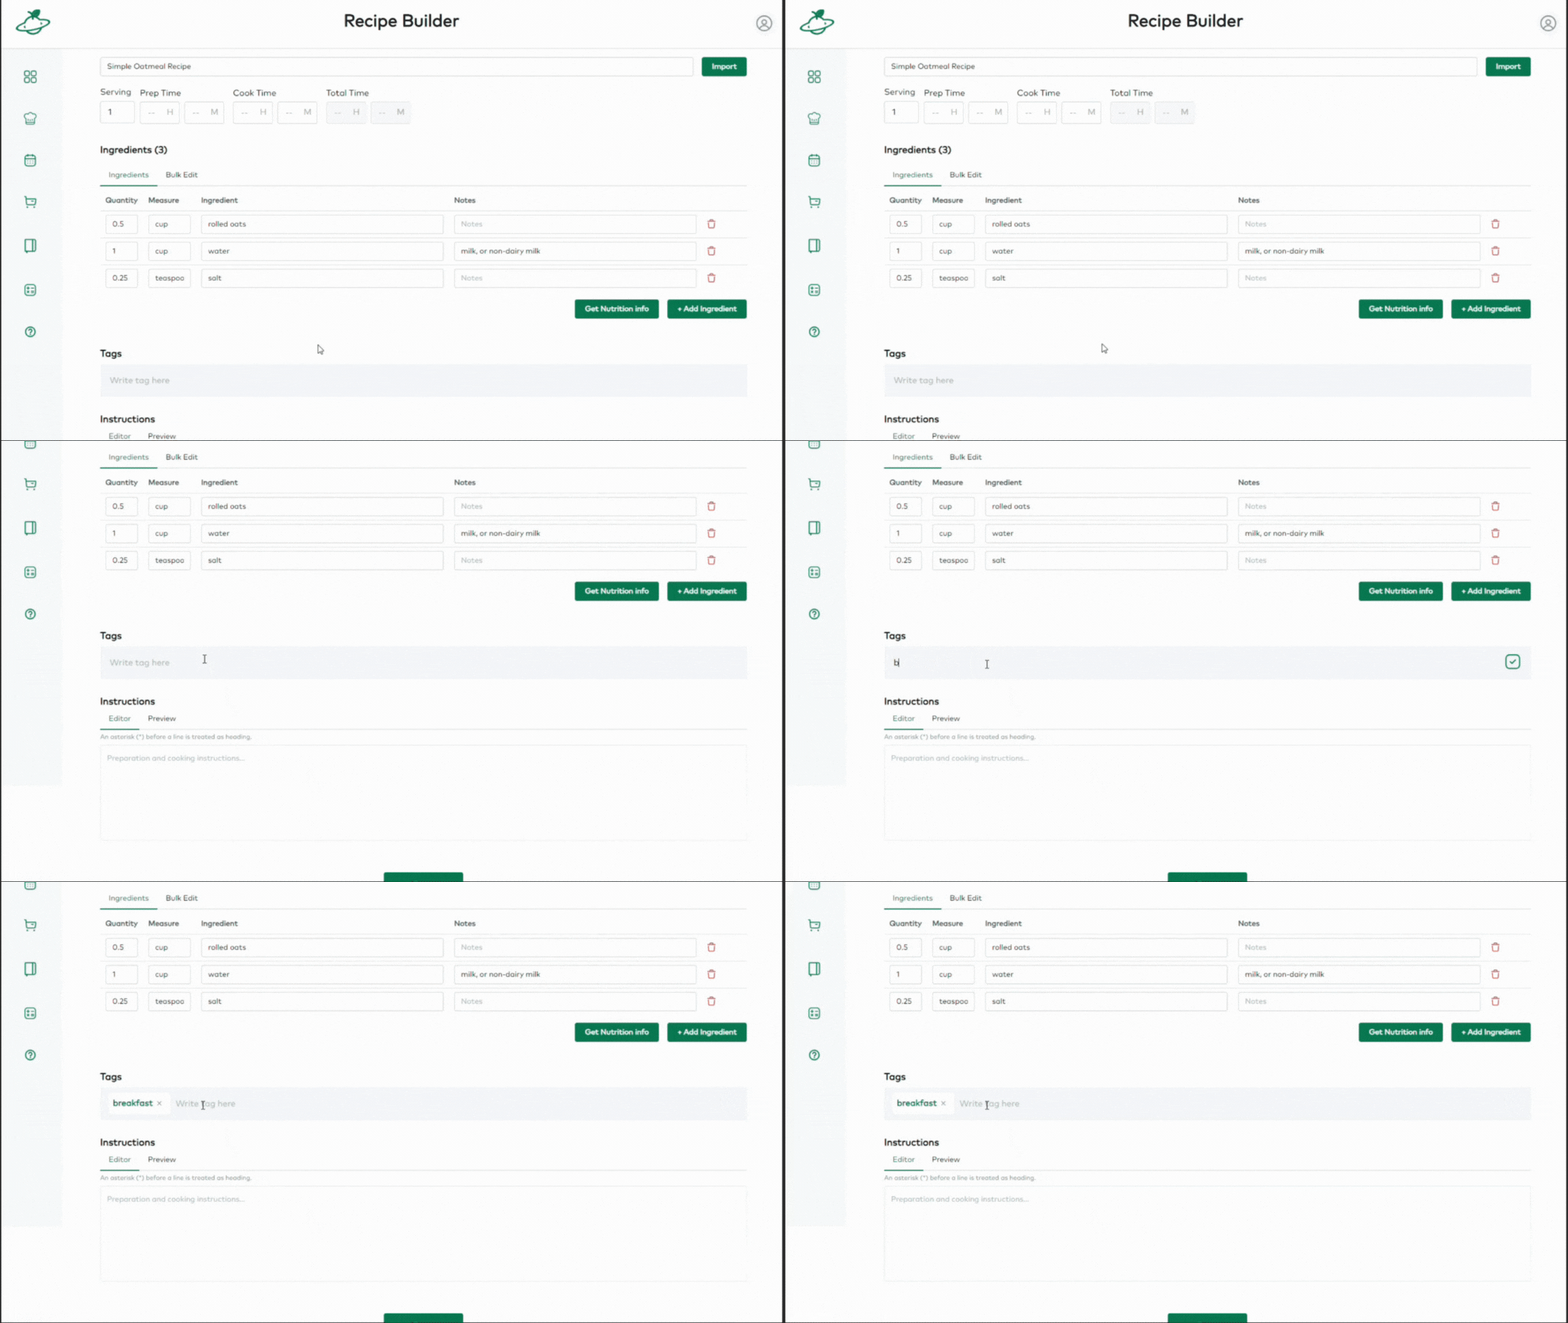
Add tags to your recipe (optional). This will help you find and organize your recipes. Simply type your tag and then click enter or click the check mark on mobile for each one.
Step 4
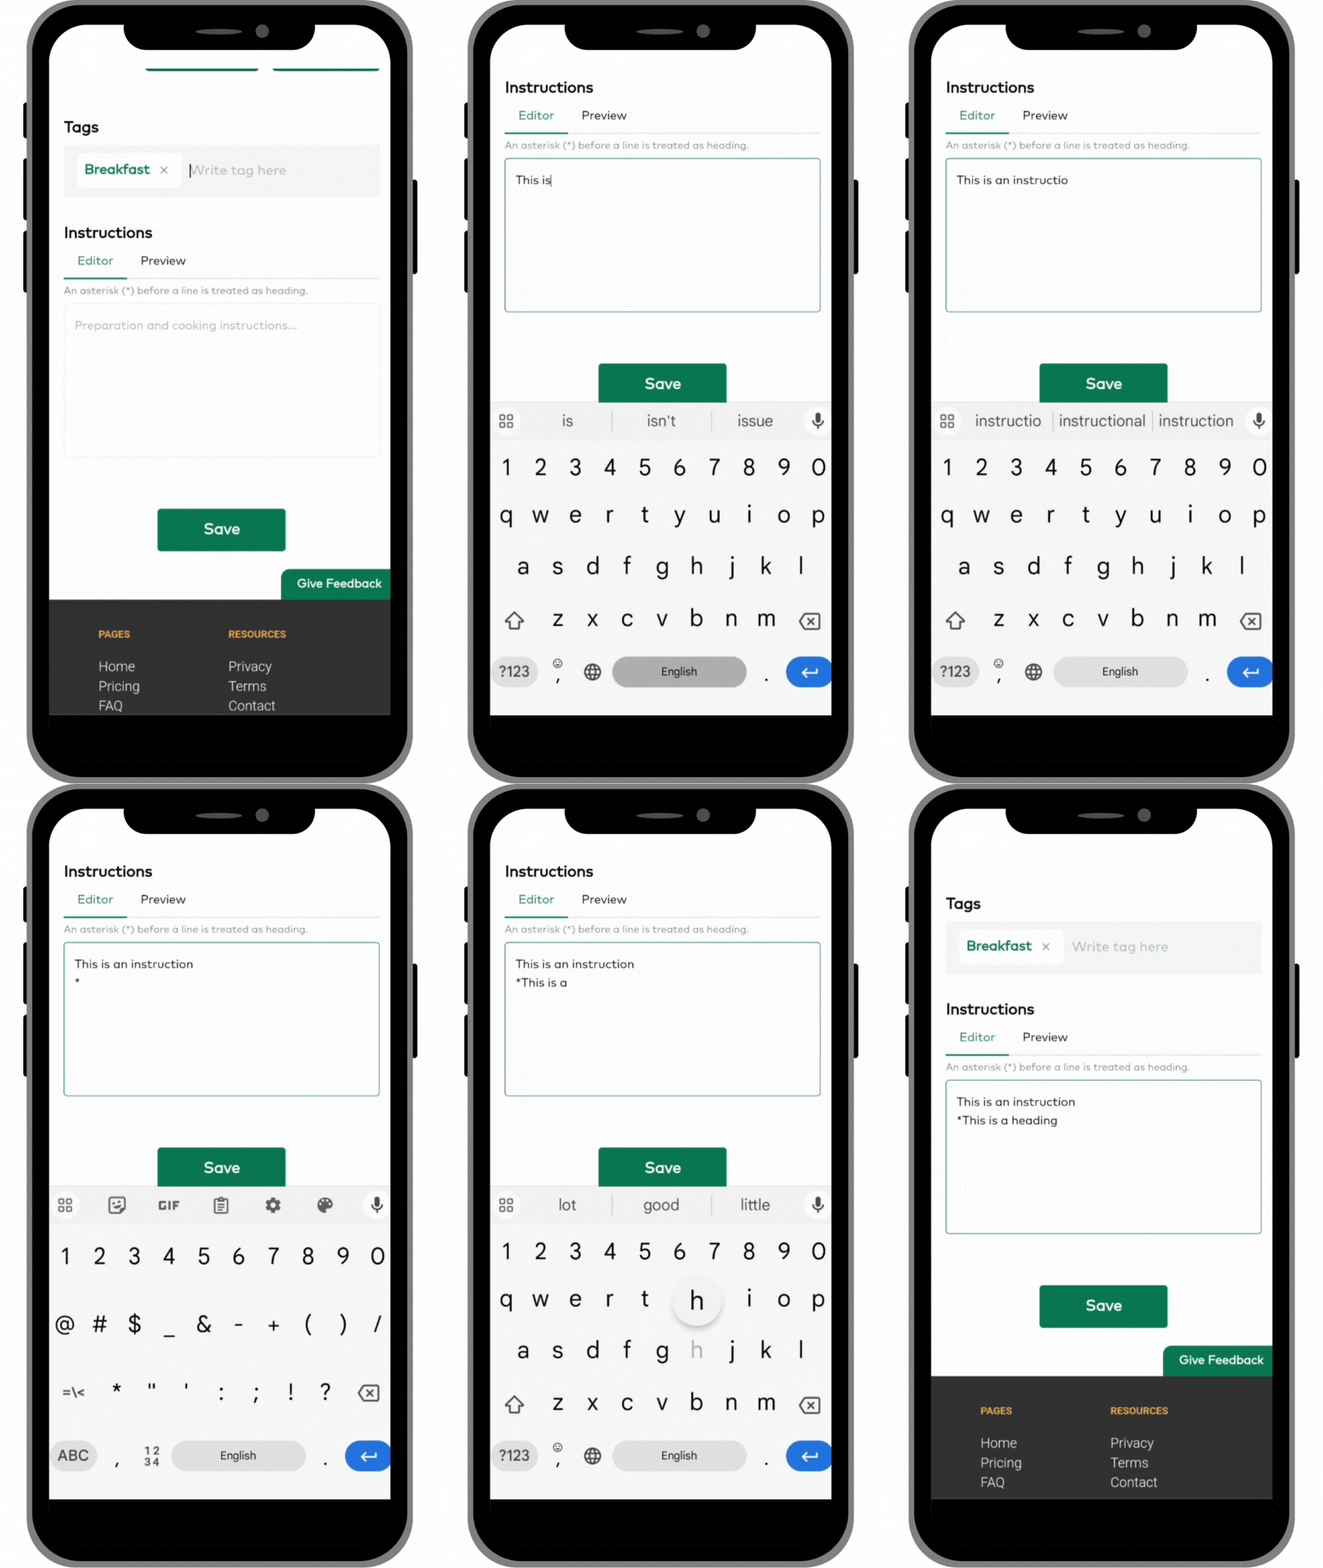
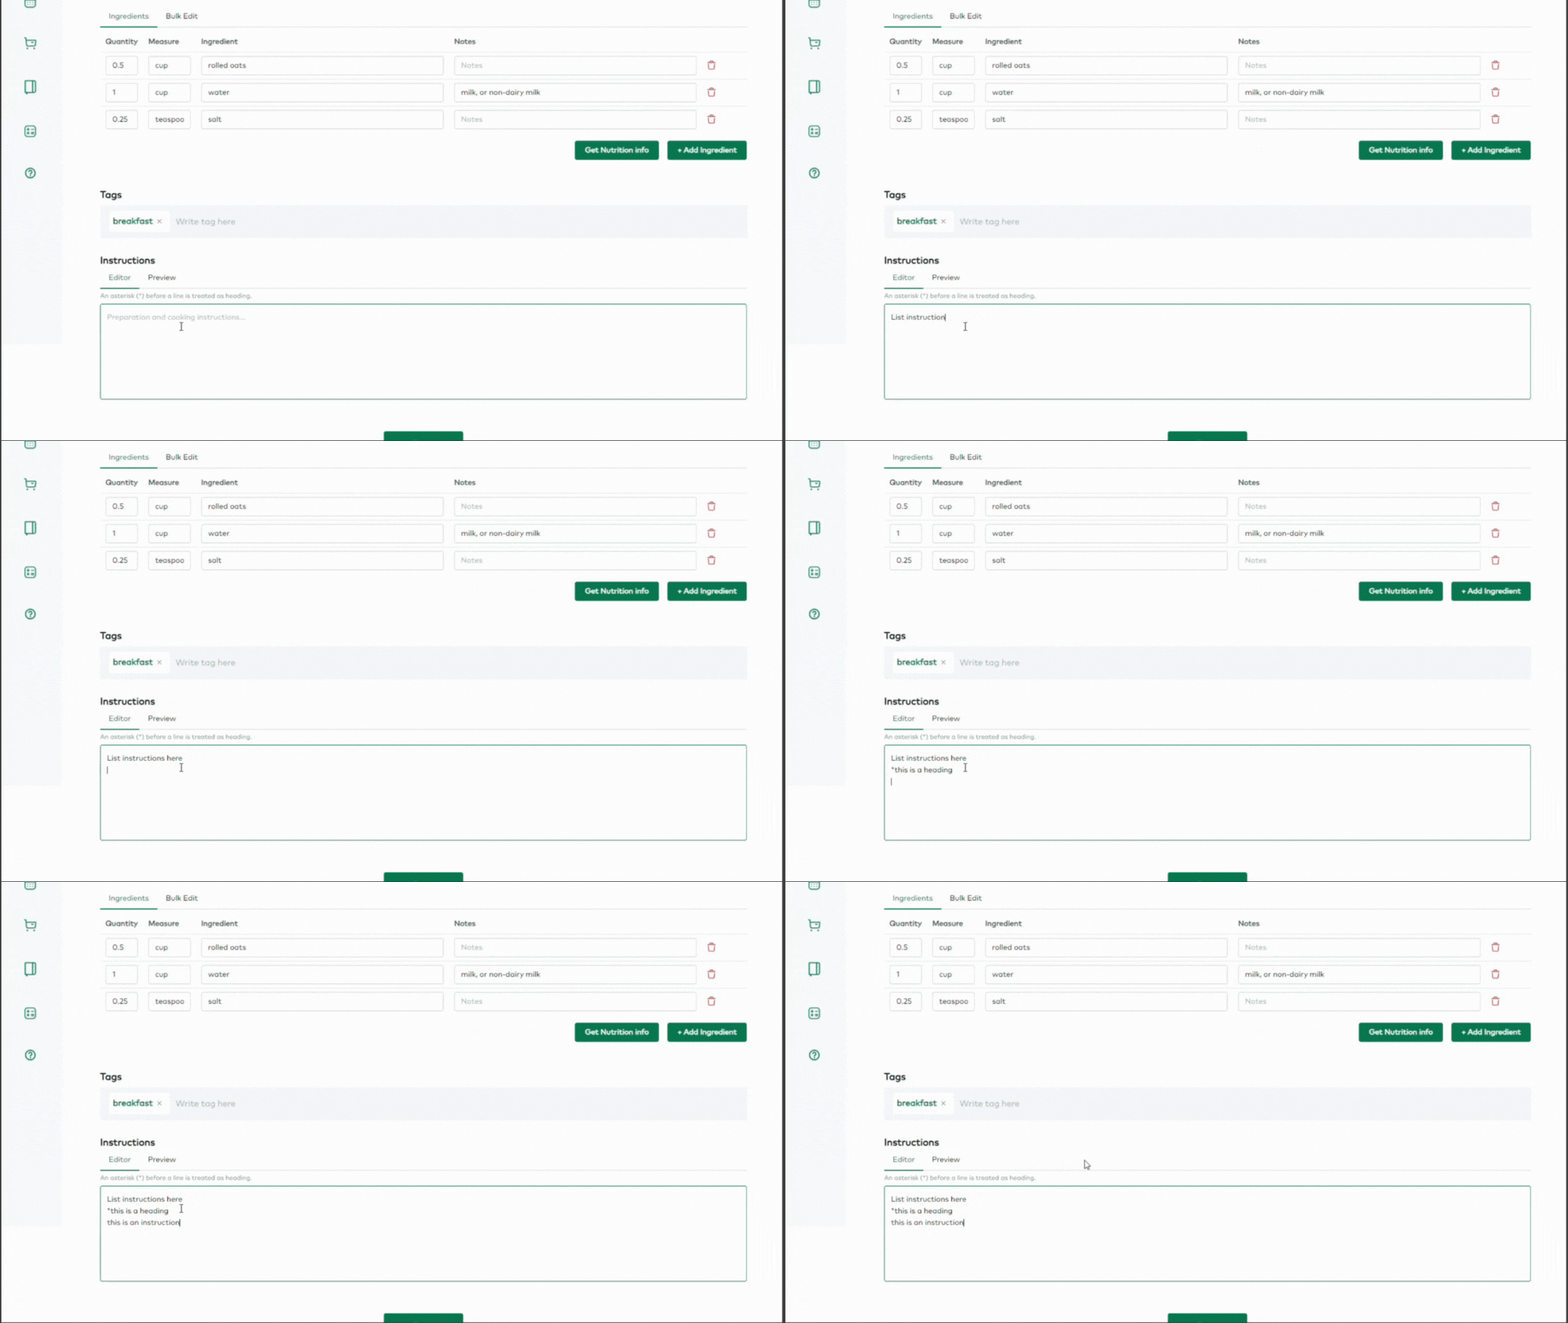
Add some directions to your recipe. Simply type or paste in your instructions in the field provided. You can use an asterisk before a line to make it a heading.
Step 5
Click the Save button and then check your recipe. You can pull the nutritional information if you’d like. Your recipe is now ready to add to your meal plan calendar or your food diary.
